Eating In: Avocado Tacos with Pickled Carrot Slaw

Can you tell we enjoy eating tacos in our household? I mean, first of all, tacos are delicious. And second of all, when you buy a pack of tortillas they give you approximately one million tortillas and I am immediately launched into a frantic use-them-all state which requires the making of lots of tacos. Or huevos rancheros. But that’s a tale for another time.

Tacos also tend to be pretty simple. These particular vegetarian tacos, courtesy of Tasting Table, just require a simple pickle and some assembly. And they’re tasty! (Apologies that all my pictures are so weird and dark, all of these recipes are always made and photographed at real dinnertime when the natural light has long since vanished.)

The first step is to boil the pickling liquid and spices for a bit. Would you believe my grocery store was out of jalapeños? What kind of world is this?

You pour the liquid over your chopped vegetables – as always, the chopping takes the longest in this recipe (my kingdom for a sous chef) – and let sit for at least 10 minutes, or until you’re ready to use them.

While the vegetables pickle, MORE CHOPPING! Prep all the other taco accoutrements. I forgot to take a photo of the avocado but it’s important, these being avocado tacos and all.

And then you just pile everything together on corn tortillas. The nice thing about tacos is that they are infinitely customizable – we added cotija cheese to a second round of these.

The verdict? The pickles are the real standout part of this recipe, and could really be paired with any taco fillings you might fancy. The Boy in particular felt these lacked some substance – I think we both ended up eating four or five – and might serve better as part of a larger Mexican meal, or with some kind of protein added. Everyone agreed, however, that they tasted delicious and were simple and quick enough to be an easy weeknight dinner, and the pickles make enough leftovers that we had a second round of tacos (with some shredded chicken) later that week…#taconight!

Avocado Tacos with Pickled Carrot Slaw
I mostly followed the Tasting Table version of this recipe, except that the Boy hates bell pepper with a fiery passion, so we subbed in onion, which pickled quite nicely. The grocery store was also out of jalapeño, but I didn’t like my substitute so please stick to the original. Again, feel free to add in cheese/shredded chicken/whatever to make these your own!
Yield: 8 Tacos
Time: 35 Minutes
Ingredients
Pickled Slaw
1 tablespoon cumin seeds
1 cup distilled white vinegar
½ cup water
2 tablespoons agave syrup or honey
2 garlic cloves, peeled and smashed
1 large jalapeño, thinly sliced into rings
2 tablespoons kosher salt
6 radishes, ends trimmed and very thinly sliced
3 medium carrots, ends trimmed and very thinly sliced lengthwise into strips
1 onion, sliced into strips
Tacos
Eight 6-inch warmed corn tortillas
2 avocados, halved, pitted and thinly sliced
½ large cucumber, very thinly sliced lengthwise into strips
½ small bunch cilantro
2 limes, sliced into wedges
Directions
Pickle the vegetables: To a small saucepan set over medium heat, add the cumin seeds and cook until fragrant and lightly browned, about 2 minutes. Add the vinegar, water, agave syrup, garlic, jalapeño slices and salt and simmer for 5 minutes. To a medium bowl, add the radishes, carrots and onion, then pour the brine over the vegetables and set aside for 10 minutes to pickle.

To each warm tortilla, add 2 pieces of avocado and a few cucumber slices. Top with a few pickled radish slices, carrot slices, onion slices and jalapeño slices. Add a few cilantro sprigs and serve with a lime wedge.

No Recipe Required: Avocado "Sushi Rice" Bowl

This post is not a fancy post. The (single) photo isn’t that good. There’s isn’t really a recipe. But this is my favorite meal when the Boy is not home and I don’t feel like putting a whole lot of work into food, so I’m sharing it.

Yep, that’s it. It’s not very pretty, but it is delicious. Here’s the recipe as best as I can tell it:

Avocado “Sushi Rice” Bowl
By Kelly Perron

I have a deep love affair with sushi rice, sweet-sour flavor, and vinegar, so once I figured out how to cram the idea of all that into a less-than-15-minute dinner, it was all over.

Yield: 1 Serving

Ingredients:
1 cup cooked grains, still warm (Brown rice is the most authentic, but here I used cous cous – it cooks in five minutes and I love it.)
2 tablespoons rice vinegar, or to taste
1 teaspoon sugar, or to taste
1 ripe avocado
3-5 sheets dried seaweed (Trader Joe’s sells these in 99-cent packs. They’re also a great snack.
Soy sauce, to taste

Directions
Mix your grains with rice vinegar and sugar in a bowl. Add more rice vinegar or sugar to taste (I also should warn you I am a vinegar fiend, so you might want to start with less than I suggest. But hey, I think it’s delicious).

Slice your avocado and place atop grains. Tear or cut seaweed into roughly one-inch pieces. Scatter over avocado. Drizzle with soy sauce. Enjoy!

Eating In: Warm Lentil and Potato Salad

I wish I had more non-cooking posts for you for variety, but alas, I haven’t brought my camera to any restaurants lately and the office makeover (the only makeover on which any progress has been made, I’m currently knee-deep in some sort of plaster every weekend) is going terribly slowly. So, cooking posts you get since we have to eat (and let’s face it, we love to eat).

Our two main criteria these days are as follows: relatively healthy and relatively quick. Bonus points if it uses ingredients we already have in our kitchen, which you’ll see here – lentils and potatoes left over from two separate salad recipes I made for a Hollywood Bowl picnic (which I would have photographed if I wasn’t in such a terrible rush). Many thanks to Smitten Kitchen, one of my most-beloved food blogs, for the recipe (there’s a good cookbook associated with that blog too).

You start with lentils. You boil them. With other stuff. Lentils are good healthy fodder.

You follow with potatoes. You also boil them. Potatoes are also good fodder, if slightly less healthy because carbs. These are Yukon Golds.

If you’re me, you chop a bunch of things while the potatoes and lentils are cooking. If you’re not me, you have everything already chopped in beautiful mise-en-place. If you’re not me, you’re probably also confident in your spelling of mise-en-place. Here we have chopped garlic, scallions, gherkins, and capers.

You make a vinaigrette with all your chopped things (another hard-to-spell word…).

And then when everything is chopped and boiled and whisked and poached (oh, I threw a poached egg on top per Deb’s suggestion to make it feel more like dinner), you throw it all together and voila! A delicious and not too heavy potato salad.

Warm Lentil and Potato Salad
Adapted very slightly from Deb Perelman of Smitten Kitchen
I made this for dinner one night when the Boy was out doing something, then ate the leftovers for lunch for the next couple of days cold (as did he, I think). They were still very tasty, though warm and topped with a poached egg (this being one of the most successful poached eggs OF MY LIFE) was my favorite version. Still, I love gherkins and capers and all things pickley, so generally this was bound to be a hit. With me. And hopefully with you. Go Smitten Kitchen!
Yield: 4 Servings
Ingredients
2 large shallots, 1 halved, 1 finely diced
4 sprigs of thyme
1 small bay leaf
1 cup lentils
1 small bay leaf
Salt and pepper
1 pound Yukon Gold potatoes (Deb uses fingerling)
2 tablespoons red wine vinegar
2 garlic cloves, minced
1 tablespoon Dijon mustard
1/4 cup olive oil
2 teaspoons capers, roughly chopped
2 tablespoons cornichons or gherkins, roughly chopped
1 to 2 scallions, thinly sliced
1/2 cup chopped parsley
Directions
Place rinsed lentils in a medium saucepan with the halved shallot, thyme branches, bay leaf, some salt and 4 cups of water. Simmer the lentils over medium heat for 25 to 30 minutes, until firm-tender. Drain (discarding shallot, thyme and bay leaf) and keep warm.
Meanwhile, in a separate saucepan, cover potatoes with 1 to 2 inches cold water. Set timer for 15 minutes, then bring potatoes to a simmer. When the timer rings, they should be easily pierced with a toothpick or knife. If not, cook a little longer. Drain and keep warm.
Make the dressing: Place the chopped shallot and red wine vinegar in the bottom of a small bowl and let sit for 5 minutes. Whisk in minced garlic, dijon, a pinch of salt, a few grinds of black pepper and olive oil. Stir in chopped capers, cornichon and scallions.
Slice potatoes into 1/2-inch segments and place in serving bowl. Add lentils, dressing and all but 1 tablespoon parsley and combine. Adjust seasoning with additional salt and pepper if needed. Scatter salad with remaining parsley.
Serve with a soft-cooked egg on top, or as a side to a larger roast, chop or sausages. Reheat as needed. If you plan to make this at the outset of several meals and would like to eat it warm, I’d keep the dressing separate, warming only the lentils and potatoes and stirring in the cold dressing to taste. But it’s good cold too if you just want to mix in all the dressing!

Keeps in the fridge for up to 5 days.

Eating In: Taco Salad

The Boy and I periodically decide we are going to be healthy.

“We’re getting on the salad train,” we announce. “No stops for donuts! No stops for cheese platters!”

This usually lasts until the next time one of us is presented with the opportunity for a donut or a cheese platter, but hey – three days of healthy eating is better than none, right?

This awesome salad, courtesy of Shutterbean, is something we discovered while riding said healthy train – but it actually tastes really, really good. (Not that healthy food doesn’t, I just generally hate all salads because my lettuce repertoire is limited to spinach and, more recently, butter lettuce.) It’s easy, once everything is chopped, and fully customizable. It also can be made to look really, really pretty to impress other people. So what are we waiting for?

If you are one of those people who’s good at thinking ahead, you’ll start by chopping everything and having your mise-en-place all ready and feeling like a fancy French chef. If you’re me, you’ll start by making the dressing and then realizing how much you have to madly chop to get the salad ready. Dressing is made in the blender:

Then, once dressing is made and you’ve gotten everything chopped…you’re basically done. The only decision left is how to serve it. I opted for Shutterbean’s fancy-schmancy way to impress the Boy.

Sure, that might be a beer in the foreground. Sure, we might have added cheese. But hey, overall this is pretty healthy and very vegetable-filled. So modify to your liking and enjoy guilt-free!

Taco Salad
Adapted from Tracy Benjamin of Shutterbean
This is mostly Tracy’s original recipe with a few to-taste and by-necessity substitutions. She used Chipotle Tabasco, I only had regular. She added red pepper, the Boy hates them. She made a vegan salad, I like cheese. But however you choose to make it – make it. You’ll feel good, and it’s not hard. And it even lived another day for leftovers (I dressed the portions individually).
Yield: 4 Servings
Ingredients
Dressing
1 large avocado, pitted with flesh scooped from skin
1/2 cup loosely packed cilantro
1/3 cup water
4 tablespoons lime juice
1 tablespoon olive oil
1/2 teaspoon salt
1 clove garlic
8-10 dashes Tabasco
Salad
1 head butter lettuce, roughly chopped
1 ear corn, shucked & cut from the cob
1 1/2 cups canned black beans, drained & rinsed
2 cups cherry tomatoes, chopped in half
2 green onions, chopped (both white and green parts)
1 jalapeño, thinly diced (seeds removed)
4 radishes, thinly sliced
1 avocado, pitted and cut into chunks
3-4 handfuls tortilla chips, for serving
1/4 cup cilantro, roughly chopped, for serving
1/2 cup shredded cheese, for serving (optional)
Directions
Dressing
Combine all ingredients together and blend until mixture is smooth and creamy. Add additional water, lime, and or hot sauce to taste. Transfer mixture to a jar and keep chilled until use.
Salad

Toss lettuce, corn, black beans, tomatoes, green onions, jalapeño, and radishes with enough avocado dressing to fully coat the mixture.  Fold in chopped avocado and divide salad between 4 large bowls. Serve with a handful of crushed tortilla chips in each bowl and top with cheese and additional chopped cilantro for garnish.

Eating In: Sweet Breakfast Risotto with Berry Compote

I am (if I haven’t mentioned this before) a great lover of breakfast. It used to be an exclusively sweet-tooth driven love – pancakes, french toast, waffles, crepes, chocolate croissants, and anything you could cover in piles and piles of berries. More recently, however, the Boy has brought me with him over to the savory side, so my breakfast affair stretches far and wide.

This particular breakfast (largely based on this recipe) was born of hunger, intrigue, what we had in the pantry, and the sweet-toothed side of my breakfast romance. It’s a sort of breakfast risotto, and while I am not sure it is my most favorite breakfast, it is certainly something different and could lend itself to umpteen variations.

You begin by boiling some stuff on the stove – fruit for the compote, and rice and milk for the risotto.

Once your rice has absorbed all the milk, making it look just like risotto (or rice pudding, I suppose), you throw in some sugar, vanilla, and yogurt, stir it up, and plop it into serving bowls.

And finally, you top the risotto with some more milk and the compote, and enjoy! It’s an unusual breakfast, with a mix of hot and cold textures, but though it takes a minute on the stove it’s actually quite easy. In the end, it feels rather high-end and special if you enjoy rice-pudding-like creations. Give it a try and let me know what you think…

Sweet Breakfast Risotto with Berry Compote

Adapted from Marta Greber’s Milk Rice with a Cherry Compote
I really liked this upon the first bites, and became a little less enamored of it as time went on. I think the reasons for this was twofold – one, I turned this recipe into two servings, which was a bit much – it’s filling! So I’m suggesting 3-4 servings here. Two, Marta Greber suggests adding lemon zest to the risotto and orange juice to the compote – I didn’t have either, but they might add some nice brightness.
Yield: 3-4 Servings
Ingredients
Compote
Handful of berries
2 tablespoons brown sugar
Risotto
1 cup arborio rice
4 cups milk
Pinch of salt
1/4 teaspoon vanilla extract
2 tablespoons sugar
2 tablespoons yogurt
Directions
In a small pot, place the berries with the brown sugar. Bring to boil and then lower the temperature and cook for about 15 minutes until the sauce gets thicker, stirring occasionally.
While berries cook, place rice in a pot with 3 cups of the milk and the salt. Bring to a boil and then lower the temperature and cook for about 15-20 minutes until the rice absorbs all the milk. Stir it so it won’t burn. When milk is absorbed, add sugar, vanilla extract, and yogurt.
Divide rice between bowls and add extra milk. Top with the berry compote.

Eating In: Spicy Sweet Potatoes With Green Beans and Poached Eggs

First off, apologies for the rather un-pretty images, as most of our cooking is done on a weeknight and there’s no light and everyone is starving and we just want food NOW. That being said, this is an excellent healthy yet yummy dish for those weeknights when everyone is starving and just wants food NOW. 
It starts out with sweet potatoes, always a win in my book, chopped and tossed with spices and cooked in a pan.

Meanwhile, green beans are steamed and eggs are poached. (Shawnda of Confections of a Foodie Bride, where I got this recipe from, says you can fry the eggs if you’d rather. Go crazy – I just love a poached egg. Combine sweet potatoes and an egg on top and I’m sold.)

And finally, it’s all combined to make an awesome, easy, who-needs-side-dishes weeknight dinner!

Spicy Sweet Potatoes with Green Beans and Poached Eggs
From Confections of a Foodie Bride

Curiously enough, I never used to venture into Egg-land beyond the style of scrambled, but the Boy has dragged me happily with him into a utopia of runny yolks and thwarted attempts at poaching. I read somewhere that you should put your raw egg carefully into a sieve, let the more liquid whites drain out, then lower the egg carefully into your poaching pot and roll it out of the sieve to prevent a million tiny threads of egg white ruining your pretty poach. And lo and behold, it worked! Give it a try. Or just fry them (something I am also bad at).

Yield: 2 servings

Ingredients

1 tablespoon olive oil
1 medium sweet potato, diced
1/4 teaspoon garlic powder
1/4 teaspoon chili powder
1/4 teaspoon cumin
1/4 teaspoon paprika
Generous pinch of salt
Several grinds black pepper
Steam-in-bag green beans
4 eggs, fried or poached

Directions
Heat oil over medium-high heat in a large pan.

Place sweet potatoes in a small sandwich bag and add dried spices – shake to coat well. Empty the bag into the pan and cook for 8-10 minutes, stirring occasionally, until potatoes are fork-tender and nicely caramelized. (Taste here and add more spices as desired, and feel free to season a bit more when assembling the dish too.)

Steam the green beans and prepare the eggs, as desired, while potatoes are cooking. Serve the potatoes and green beans topped with eggs.

The Cake That Was (Not) Bad

One of my favorite food blogs – in fact, one of the gateway food blogs that led to the enormous backlog of posts I have bookmarked to read and taste test on Feedly – is Smitten Kitchen. Gorgeous photos, pretty much infallibly delicious recipes, one adorable toddler…what’s not to love? So, of course, Deb Perelman’s (the woman behind the blog’s) cookbook went straight to the top of my Christmas wish list.
Since I got the book (Santa was good to me), I’ve made her mushroom bourguignon, which was a big hit at our Game of Thrones premiere party. This time, I moved on to dessert. Red wine velvet cake, to be exact.

As far as layer cakes go, this one wasn’t crazy difficult. (I’ve done a German Chocolate Cake from scratch, and that was…less simple.) You start out by lining and flouring three pans.

You then mix up a basic cake batter base, which, I’ll warn you, looks REAL gross when you add the wine. Don’t be alarmed. Ignore the alarm that rises within you despite Deb telling you not to be alarmed. Press onward.

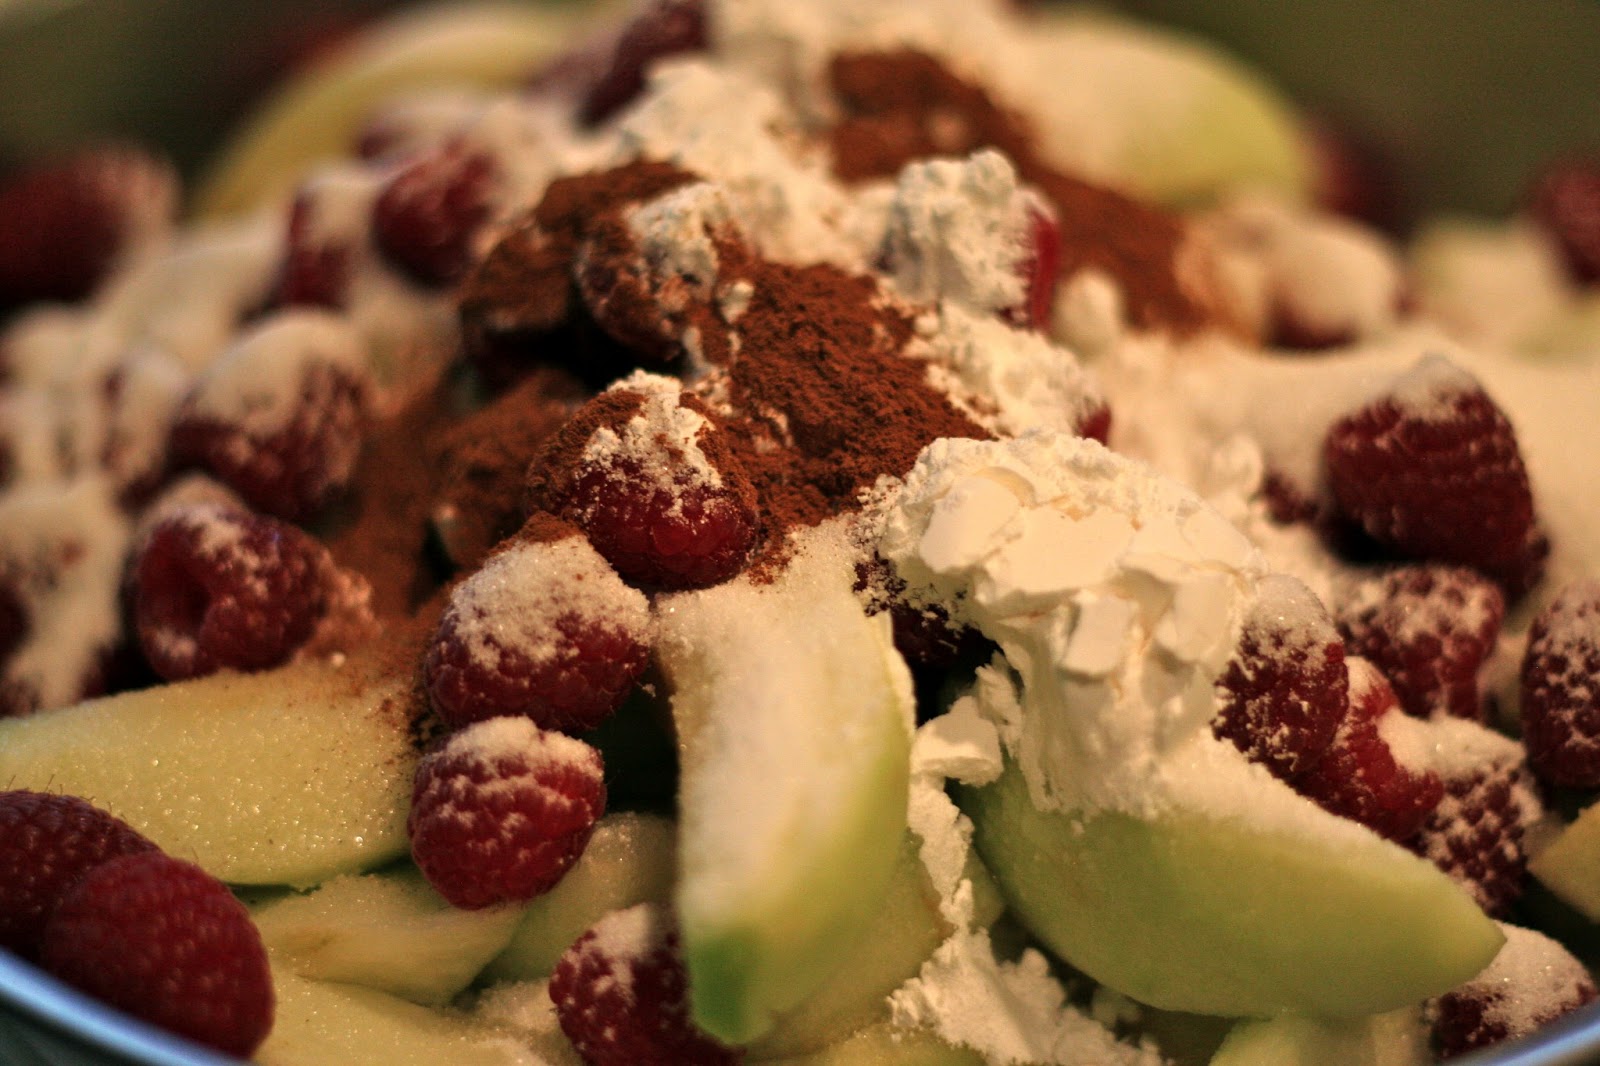
Add in the dry ingredients.

Once everything looks more like a batter that isn’t cause for alarm, it goes into the pans and into the oven.

And out comes…a baby alligator! Just kidding, it’s a cake. As expected. It looks pretty much like a chocolate cake. (And technically, it’s three cakes. Unless your oven ate the other two.)

You mix up a mascarpone topping and frost. No need to do the sides. This is a rustic cake (mine’s a bit tippy, we’ll just call it extra rustic). Put it on a cake stand. Be impressed that you finally found a use for your cake stand.

Now, the taste test is where things got…interesting. The Boy tried it, and he wasn’t terribly impressed. It was “weird.” I didn’t mind it – it was definitely different, and you could taste the wine, but that wasn’t a bad thing, was it? As I only have an audience of one, doubt crept into my mind. What if it was bad? What if everyone hated it?
When we got to the party (for which the cake was made) I handed it off with an itmightbeterrible mumble. And yet – it was well received! Lauded, even. They kept eating it for days!
So – Smitten Kitchen:1, Scientific Sample of One: 0. As expected.
Red Wine Velvet Cake with Whipped Mascarpone
From The Smitten Kitchen Cookbook by Deb Perelman
This is definitely a cake for grown-ups, since it is a little different – not terribly sweet, nor terribly chocolatey, with a strong hint of wine. I might have wanted a bit more filling, so maybe make a double recipe (Deb suggests doing that to cover the sides if you are so inclined, though she warns that cake may still peek through). Still, as far as layer cakes go? Easy. And pretty. And looks damn good on a cake stand (if I do say so myself).

Yield: 16 to 20 servings (1 towering 9-inch cake)
Cake Ingredients

16 tablespoons (225 grams or 2 sticks) unsalted butter, at room temperature, plus more for pans
2 3/4 cups (345 grams) all-purpose flour, plus more for pans

2 cups (380 grams) firmly packed dark brown sugar

2/3 cup (135 grams) granulated sugar

4 large eggs, at room temperature

2 cups (475 ml) red wine (any kind you like)

2 teaspoon (10 ml) vanilla extract

1 1/3 cup (115 grams) Dutch cocoa powder

1/2 teaspoon baking soda
1 teaspoon baking powder
3/4 teaspoon ground cinnamon

3/4 teaspoon table salt
Filling Ingredients

16 oz. (500 grams) mascarpone cheese
2 1/3 cups (280 grams) confectioners’ sugar

Pinch of salt

1/4 teaspoon vanilla extract
Cake Directions
Preheat the oven to 325°F. Line the bottom of three 9-inch round cake pans with parchment, and either butter and lightly flour the parchment and exposed sides of the pan, or spray the interior with a nonstick spray. In a large bowl, on the medium speed of an electric mixer, cream the butter until smooth. Add the sugars and beat until fluffy, about 3 minutes. Add the egg and yolk and beat well, then the red wine and vanilla. Don’t worry if the batter looks a little uneven. Sift the flour, cocoa, baking soda, baking powder, cinnamon and salt together, right over your wet ingredients. Mix until 3/4 combined, then fold the rest together with a rubber spatula. Divide batter between prepared pans. Bake for 25 to 30 minutes, or until a cake tester inserted into the center of each layer comes out clean. The top of the caks should be shiny and smooth, like a puddle of chocolate. Cool in pan on a rack for about 10 minutes, then flip out of pan and cool the rest of the way on a cooling rack.
If your cakes have domed, you can trim layers flat with a serrated knife.
Filling Directions
In a medium bowl, beat the mascarpone with the confectioners’ sugar, pinch of salt, and vanilla extract at medium speed until the mixture is light and fluffy, about 1 to 2 minutes.
Assembly Directions
Place the first cake layer on a cake stand or plate, and spread with 1/3 of the filling. Repeat with the remaining two layers. Chill the cake in the fridge until you’re ready to serve it.

Salted Double Chocolate Chunk Cookies

Sometimes, when you’re waaay behind on blog posts, you take a look through your iPhoto and realize just how behind you are. You might, for instance, realize you haven’t posted about some of the stuff you made…before you moved. And sometimes, while you’re trying to catch up on vacation photo editing, you figure you should probably post some of those recipes. Since they were yummy and all.

Which brings us to chocolate.

And butter.

And melted chocolate and butter.

Which becomes a chocolate batter…

And after a little time in the oven…

Salted Double Chocolate Chunk Cookies! Salt on chocolate on chocolate. Yep.  I knew I should post this one.

Salted Double Chocolate Chunk Cookies
From Annie’s Eats

These are a simple, yummy cookie that’s a little different from your average chocolate chip. Lazy (and penny-pinching) girl that I am, I used semi-sweet chocolate chips instead of chopping my own chocolate, and just regular old salt instead of Fleur de Sel. I’m sure that these would be even more awesome with those gourmet additions…but they’re not half bad my way either.

Yield: about 24 cookies

Ingredients
8 oz. semisweet chocolate, coarsely chopped

4 tbsp. unsalted butter

2/3 cup all-purpose flour

½ tsp. baking powder

¾ tsp. fleur de sel (sea salt), plus more for sprinkling

2 large eggs, at room temperature

¾ cup packed light brown sugar

1 tsp. vanilla extract

12 oz. semisweet chocolate, coarsely chopped

Directions
Preheat the oven to 350˚ F.  Line two baking sheets with parchment paper or silicone baking mats.

Combine the 8 ounces chopped chocolate and butter in a heatproof bowl set over a pan of simmering water, and heat until the chocolate and butter are melted and smooth, stirring occasionally.  (Alternatively, heat in the microwave in 25-second intervals, stirring in between.)  In another mixing bowl, stir together the flour, baking powder and salt.

In the bowl of an electric mixer, combine the eggs, brown sugar and vanilla.  Beat on medium-high speed until the sugar has completely dissolved, about 4-5 minutes.  Reduce the speed to low and add the melted chocolate mixture, blending until incorporated.  Add in the dry ingredients and mix just until combined.  Fold in the remaining chopped chocolate with a spatula.  Drop heaping tablespoons of dough onto the prepared baking sheets, about 2-3 inches apart (I used my medium-sized dough scoop).

Bake, rotating the baking sheets halfway through, until the cookies are just slightly soft in the center and crackly on top, about 10-12 minutes.  Sprinkle lightly with additional salt and let cool on the baking sheets 10 minutes.  Transfer to a wire rack to cool completely.  Store in an airtight container.

Eggs Benedict for the Unambitious

Sometimes you want Eggs Benedict. Well, all the time I want Eggs Benedict. But for the longest time, I thought of Eggs Benedict as something I could only get at brunch, from under the skilled hand of a professional cook. Why? Well, duh. The Hollandaise, legendary nemesis of the home cook. I had no idea how it was made, just that it was difficult, so in fear of a “broken” Hollandaise, I left it to the pros.
And then.
While browsing my beloved food blogs, I came upon “Easy Blender Hollandaise Sauce” on Alice Currah’s adorable blog Savory Sweet Life. Easy? Blender? And then I saw the cook time. Three minutes. I was in.
And so we had breakfast for dinner – avocado Eggs Benedict. Ham, poached eggs, english muffins, avocado, and Hollandaise.
And the Hollandaise? It was good! Sure, it wasn’t exactly like “real” Hollandaise, but it was easy, and it made a damn tasty Eggs Benedict.

Easy Blender Hollandaise Sauce
From Alice Currah of Savory Sweet Life

Ok, so technically I found this recipe and the Boy made it, but he said it was really easy. In fact, the poaching of the eggs was the trickiest part of this dinner (and that’s a whole ‘nother kettle of fish). As he says, you can taste the butter, but as I say, what’s the problem with that?

Yield: 3/4 Cup
Time: 3 Minutes

Ingredients
3 egg yolks
1 tablespoon fresh lemon juice
¼ teaspoon kosher salt
⅛ teaspoon Dijon mustard
Dash of cayenne pepper
½ cup (1 stick) butter

Instructions
Put the egg yolks, 2 teaspoons lemon juice, salt, mustard, and cayenne in blender.

Heat the butter in the microwave for 30 seconds first and then in 15 second increments until melted and slightly foamy (approx. 45 seconds total).

Place the lid on the blender and blend on high for 5 seconds. Remove the venting lid from the blender lid cover. Blend the egg mixture on medium high speed and slowly pour in a very thin stream the hot butter while the blender is on.

Once all the butter has been added, place the vent lid back on the blender and blend on high for 5 seconds. Taste the sauce and add the remaining lemon juice if necessary if not more to your liking. Serve immediately.

Crumble for a Crowd

I usually help out when my Mom has some sort of event. And by “help out,” I mean bring dessert. In this case, it was her book group’s annual Scene Night, which I also take part in and emcee…so I guess I can officially say I “help out” with this one. The Boy moves furniture, and then hides when all the ladies arrive. It’s a good deal.
People always bring chocolate, so I decided to go with something from Rustic Fruit Desserts by Cory Schreiber and Julie Richardson. I’d never made anything from the book before, but I’d been drooling over the pictures for months, so it was about time. The book is divided up by season, which makes it a cinch to cook seasonally (like all my blogs are always telling me to do). I flipped to “Winter” and picked Apple Cranberry Oat Crumble.
But oh, fickle California! I headed to the grocery store and could not find a single cranberry. Not frozen, not fresh. Nothing. So, in a moment of improvisation and really-not-wanting-to-go-to-another-store, I picked up some raspberries and hoped for the best.
You start out with apples. This is the most time-consuming part of the dessert, which is otherwise pretty simple. You peel, slice, peel, slice, peel, slice, until you’ve got approximately a small mountain of apples.

Then, you make the topping so it can chill while you’re doing the rest of everything. It’s got oats, so it’s totally healthy. Just don’t mind the brown sugar. Or the butter. Totally healthy.

Once the topping is safely cooling, you mix together your fruit. At this point, I still wasn’t sure about the raspberries, but they sure looked pretty:

You stir in sugar and a little cornstarch and cinnamon to thicken and sweeten the filling before piling it all into a big baking dish.

And in the end – a lovely brown crispy crumble. After all the cranberry-raspberry stress, this may actually be the best crisp/crumble I’ve ever made. The tart raspberries gave it a uniquely fresh, fruity flavor, but all credit goes to authors Cory and Julie for inventing my new favorite crumble topping. Normally, I find crumbles a bit too oaty and “granola” tasting, but this was the perfect texture of buttery, crumbly, crunchy sweetness. I probably could have eaten half the pan. Luckily, Mom’s book group was all too happy to do that for me.

Apple Raspberry Oat Crumble
Adapted from Rustic Fruit Desserts by Cory Schreiber and Julie Richardson

This really is an easy dessert (especially if you can hire a sous chef to peel and slice your apples), and great for a crowd. I’m sure it’s delicious with cranberries as well, and if you want to try that original version, substitute fresh or frozen cranberries for the raspberries. I even had one of my Mom’s friends say, “I don’t even like apple desserts, and this is amazing.” Score one for Kelly. Make this now.

Yield: 8 to 12 Servings
Time: 60 to 70 Min

Ingredients:
Butter to grease dish
Vanilla ice cream or whipped cream, to serve

Topping Ingredients:
2 cups rolled oats
1 1/2 cups all-purpose flour
1 1/3 cups packed brown sugar
1/2 teaspoon salt
3/4 cup unsalted butter, melted

Filling Ingredients:
8 large apples, peeled, cored, and sliced 1/4 inch think
2 cups fresh raspberries
1 1/3 cups granulated sugar
2 tb cornstarch
2 tsp ground cinnamon

Directions:
Preheat the oven to 375 degrees. Butter a 3-quart baking dish.

To make the topping, mix the oats, flour, brown sugar, and salt in a bowl. Stir in the melted butter, then clump with your hands. Place topping in the freezer while you prepare the filling.

To make the filling, toss the apples, raspberries, sugar, cornstarch, and cinnamon in a (very) large bowl. Spread filling in buttered baking dish.

Press the topping evenly over the fruit, then bake for 60 to 70 minutes, or until the crumble is lightly golden and the filling is bubbling up in the corners. Let cool for 20 minutes, then serve with ice cream or whipped cream.