No Recipe Required: Carrot & Zucchini Ribbon Pasta

First off – the title of this post is “No Recipe Required,” but I want to make clear that this is indeed a recipe, and not my recipe, but the recipe of the brilliant Erin Gleeson from her cookbook The Forest Feast. And “No Recipe Required” is not meant to cast aspersions on her recipe, but instead to compliment her on creating something so easy and simple that I (who cling to recipes like safety blankets) feel like I can now confidently throw this together without looking at the recipe and hence feel all chef-y and talented. Also, this is a recipe that could lend itself so easily to many, many variations and adjustments, which I think is another mark of a great home-cook recipe.
I’ll give you the basics, but you should really get the book since her way of showing it to you is far more beautiful. Also, all CSA boxes should point their customers straight to that book. No, I’m not getting paid for this.
First off, you start some fettuccine (eight ounces or so) cooking. While it cooks, ribbon two carrots and two zucchini. I used a mandoline. I think I might have used one zucchini, which worked out just fine. You also chop up a ton of garlic (five cloves, though I probably did six).

All your chopped stuff goes in a big skillet with olive oil, salt, and pepper and sautés for five minutes. 

Then, you add in the cooked pasta, a tablespoon of fresh chopped thyme leaves, and a tablespoon of butter. The butter melts, and you mix it all up and serve it. A slightly more virtuous way to have pasta, and an easy and delicious one at that. Plus, I know a few of you are probably about to be ROLLING in zucchini, so you’re welcome.

I was not compensated for this post. All the opinions are my own.

Double the Chocolate, Double the Fun: Valerie Gordon’s Chocolate Cookies

Holidays and parties for me = an excuse to bake.
I love baking, but I don’t do it in my regular, everyday life because then I inevitably eat five brownies on a Tuesday night and one for breakfast the next morning and the Boy eats three brownies instead of lunch and well, that’s not really a sustainable lifestyle.
So I prefer to save my baking for instances in which there will be many, many people throwing their diets to the wind and rapidly consuming all the evidence.
Case in point: 4th of July, these chocolate cookies.

The recipe for these cookies came from Sweet by Valerie Gordon, who you may recall as being the genius behind the Salted Caramel Pudding Parfaits at our Mediterranean dinner party. They are a relatively straightforward cookie recipe that ends up with a light and thinnish but spectacularly chocolatey cookie.

The dough is a bit wet – mine was almost more of a thick batter – so take very seriously her recommendation to chill it for two-plus hours. Otherwise adorable cookie balls will NOT be happening.

As you can see, some of my cookies made friends with each other during baking and had to be forcibly separated into slightly weird shapes, but it didn’t matter. They were chewy and chocolatey and absolutely full of big chunky chocolate chippy bites that somehow stayed melty-soft even long after they were cooled.

As is tradition, I left the remainders at our hosts’ house, knew that was the correct and healthy decision, and regretted it mightily for the next three days every time I wanted a cookie.

Chocolate Cookies
From Valerie Gordon’s Sweet

These cookies aren’t difficult, but do be aware of the dough-chilling time as that could catch you by surprise (these aren’t last-minute cookies). They are, however, delicious. I found the recipe yields something more around the likes of 36 cookies, but maybe I made mine too big and that’s why a bunch of them ended up touching each other after spreading. If that does happen, gently separate them with a thin spatula or knife just after they come out of the oven.

Yield: 50 Cookies

Ingredients
1 cup all-purpose flour
1/3 cup unsweetened cocoa powder
¼ teaspoon baking powder
1½ teaspoon kosher salt
2 sticks unsalted butter, softened
1½ sugar
1 large egg
1 tablespoon whole milk
1 teaspoon vanilla extract
1½ cups 61-percent bittersweet chocolate chips or bittersweet chocolate, finely chopped

Directions
Sift together the flour, cocoa powder, baking powder and salt into a medium bowl. Set aside.

In the bowl of a stand mixer fitted with the paddle attachment (or in a large bowl using a handheld mixer), cream the butter and sugar on medium speed until light and fluffy, about 4 minutes. Add the egg, mixing well. Add the dry ingredients and continue beating until the batter is smooth. Add the milk and vanilla, then add the chocolate chips, beating until combined.

Turn the dough out onto a cool surface, form it into a disk, and wrap in plastic wrap. Refrigerate until firm, approximately 2 hours.

Position the racks in the upper and lower thirds of the oven and heat the oven to 350 degrees. Line two heavy, large baking sheets with parchment paper or silicone liners.

Using a 1-ounce scoop, scoop the dough onto the lined baking sheets, spacing the cookies 2 inches apart, or use a measuring spoon to scoop heaping tablespoons of dough on to the sheets. Let the dough come to room temperature.

Bake the cookies for 11 minutes, or until they lose their shine. Let cool on the baking sheets on cooling racks for 10 minutes.

Using an offset spatula, transfer the cookies to a cooling rack to cool completely.

The cookies can be stored in an airtight container up to 4 days (these cookies are quite fragile and do not freeze well).

Eating In: Carrot-Walnut Loaf Cake

I subscribe to exactly one magazine: Bon Appétit. (That should pretty much tell you where food falls on my priorities list.) It has evolved into a perfect mix of food travel and restaurant reviews and food trends and recipes. It’s awesome. Bon Appétit, if you ever need a digital expert to add to your team, I’m right here.

At the beginning of the magazine is a section, rather like the “reader letters” section in many magazines, where readers can write in and request that Bon Appétit track down the recipe of some delicious dish that they had in some restaurant somewhere and just have to, have to recreate at home.

As it so happens, I picked up this carrot loaf recipe from exactly that section when in search of what to do with some of the one-too-many carrot bunches I’d received in our bi-weekly CSA box. Bonus: I already had most of the other ingredients on hand (see the recipe note to illuminate that “most”).

The stars of the show are raisins, walnuts, and grated carrots, which were surprisingly quicker and easier to grate than I had mentally prepared myself for.

Like most cake-type recipes, you sift all the dry bits together (and in this case, mix some of the add-ins with a bit of flour)…

…and then blend in with the wet ones, making a simple batter.

The mix-ins are added (including the carrots), and you’re left with a not-very-picturesque batter, which goes into the loaf pan and, subsequently, the oven.

And comes out crispy and warm and gorgeous.

Obviously, the brown-sugar-topped top crust is the best part of this, so kindly eat your slices from the bottom up to so as to preserve that sweet, slightly crunchy sliver of goodness for last. We’ve been eating this for breakfast for the last three days, and I’ve heard no complaints yet.

Carrot-Walnut Loaf Cake
By Breads Bakery in New York, as Printed in Bon Appétit

I didn’t have golden raisins, but regular ones seemed to perform just as well. I also found myself short one egg just as I got to that step in the recipe (26 years old and I still can’t read through a whole recipe before I start cooking it, what is to become of me?), but I found a substitute involving oil, water, and baking powder that worked remarkably well.

Yield: One 9”x5” Loaf

Ingredients
1 cup vegetable oil, plus more
1¼ cups plus 1 tablespoon all-purpose flour; plus more
1½ teaspoons baking powder
1½ teaspoons ground cinnamon
½ teaspoon kosher salt
½ cup golden raisins
½ cup walnuts, coarsely chopped
3 large eggs
1 cup granulated sugar
2 teaspoons vanilla extract
8 ounces carrots, coarsely grated (about 2 cups)
2 teaspoons light brown sugar

Directions
Preheat oven to 350°. Lightly oil and flour a 9×5″ loaf pan. Whisk baking powder, cinnamon, salt, and 1 ¼ cups flour in a small bowl. Toss raisins, walnuts, and remaining 1 Tbsp. flour in another bowl.

Using an electric mixer on medium-high speed, beat eggs and granulated sugar in a medium bowl until light and fluffy, about 4 minutes. With mixer running, gradually drizzle in 1 cup oil, then add vanilla. Fold in dry ingredients, raisin mixture, and carrots; scrape batter into prepared pan. Sprinkle with brown sugar.

Bake cake until a tester inserted into the center comes out clean, 65–75 minutes. Let cool slightly in pan, then turn out onto a wire rack to cool completely.

Do Ahead: Bake up to 2 days ahead. Store wrapped at room temperature.

I was not compensated for this post. All the opinions are my own.

Almost-Burnt-Still-Tasty Salted Caramel Crunch Bars

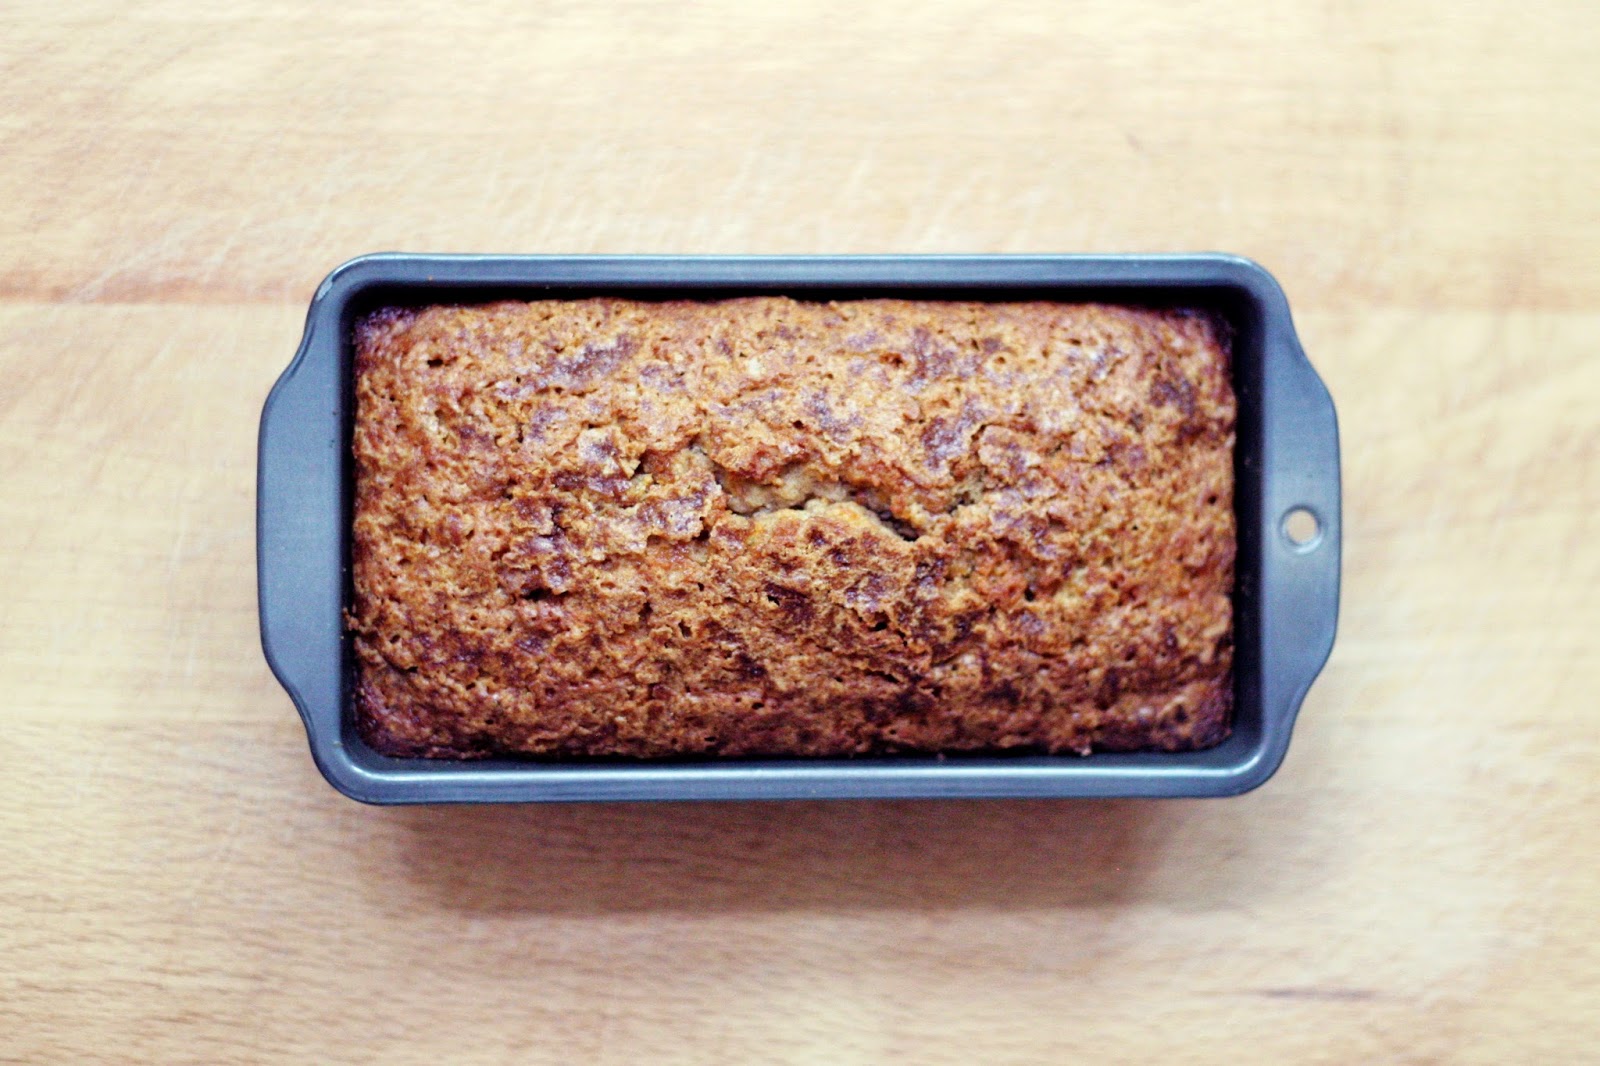
I’m not sure I have the attention span for caramel.
You have to watch it, I remind myself when it starts cooking. Watch it or it will burn. It. Will. Burn. And then approximately 15 seconds before it’s done I turn away to pet the cat or check my phone or see the video the Boy just found on his computer and it’s so great I have to see it NOW please and then I come back 30 seconds later and OH LOOK IT’S BURNED.
You never want to make a second batch of caramel, though, so depending on how far gone it is sometimes I’ll still just use it. After all, that whole “burnt sugar” or “bitter caramel” or whatever taste is sort of in right now, right? (Don’t answer that.)
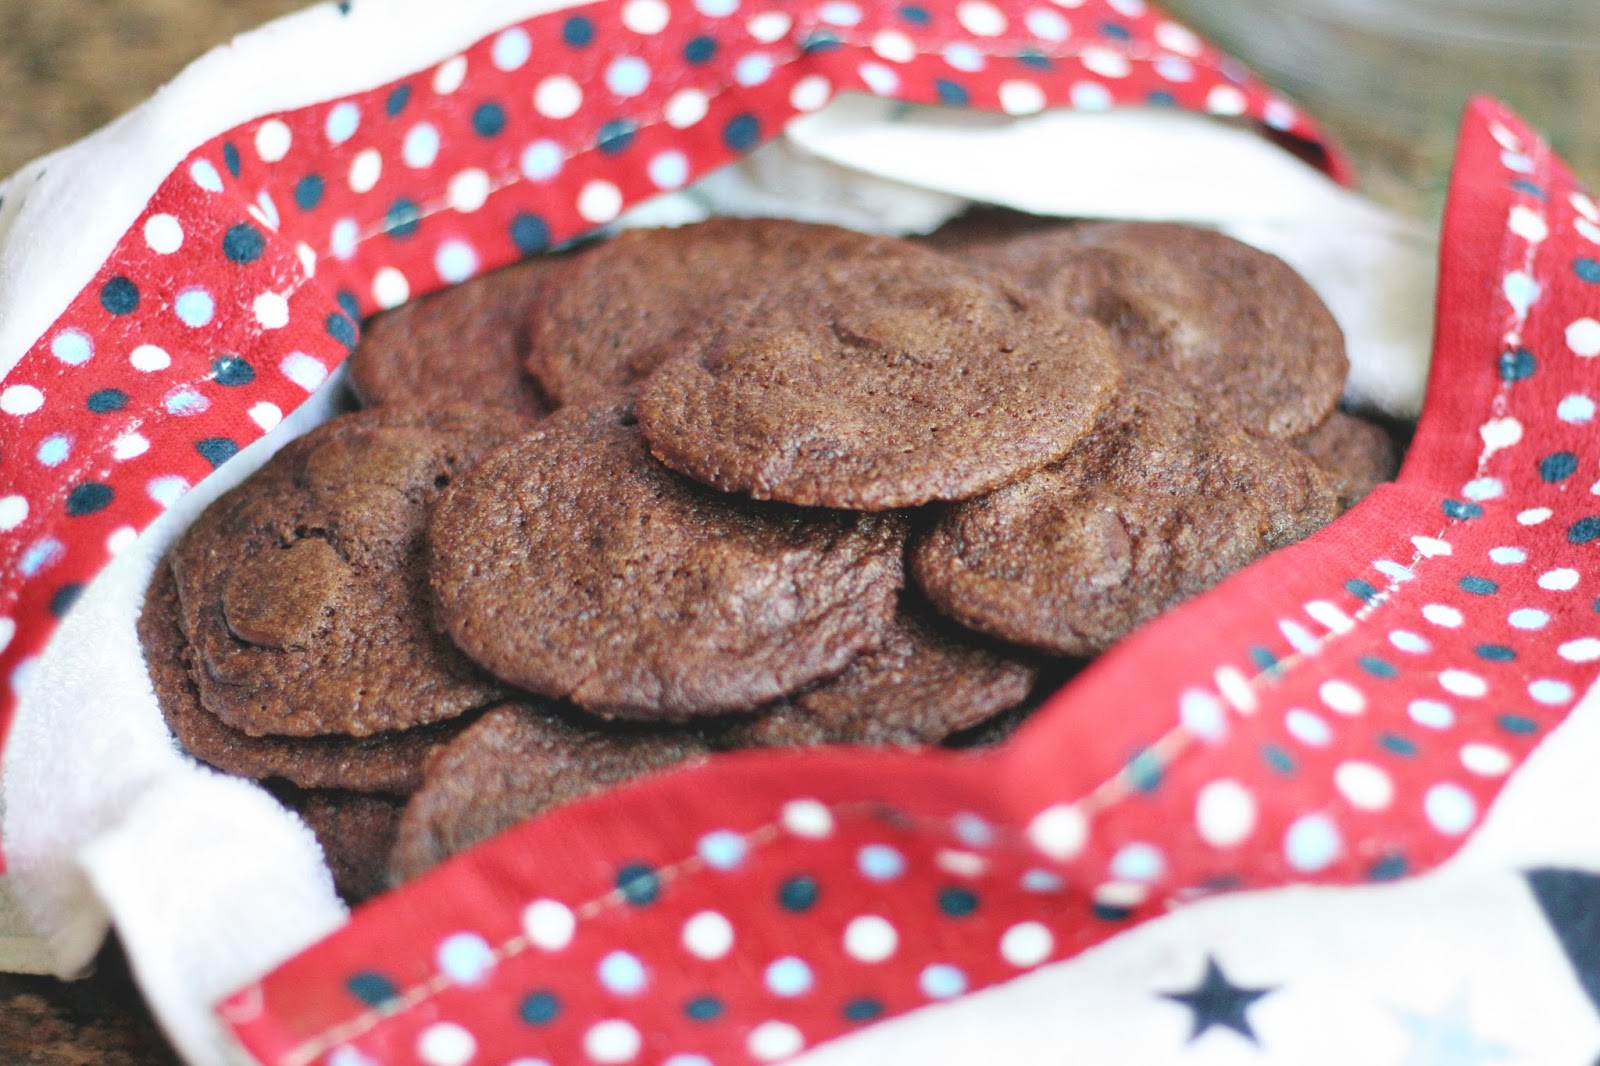
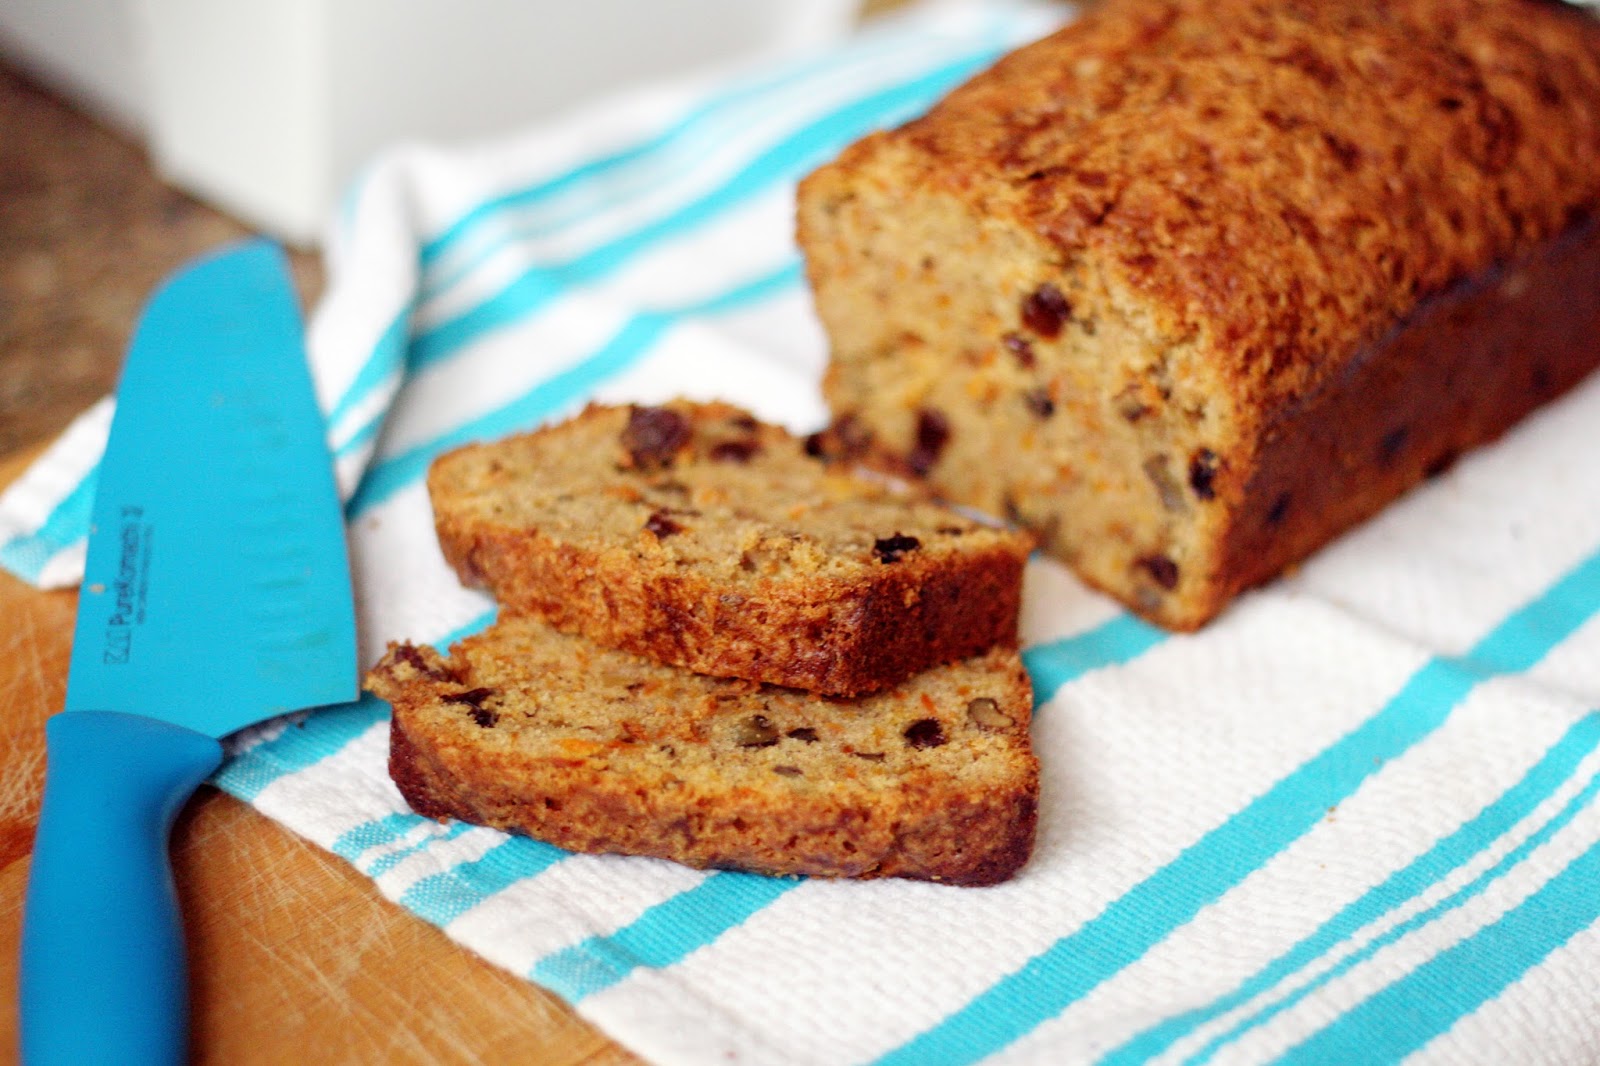
All this goes to say that when I made these Salted Caramel Crunch Bars, I burned the caramel a little. But they were still tasty! Whew.
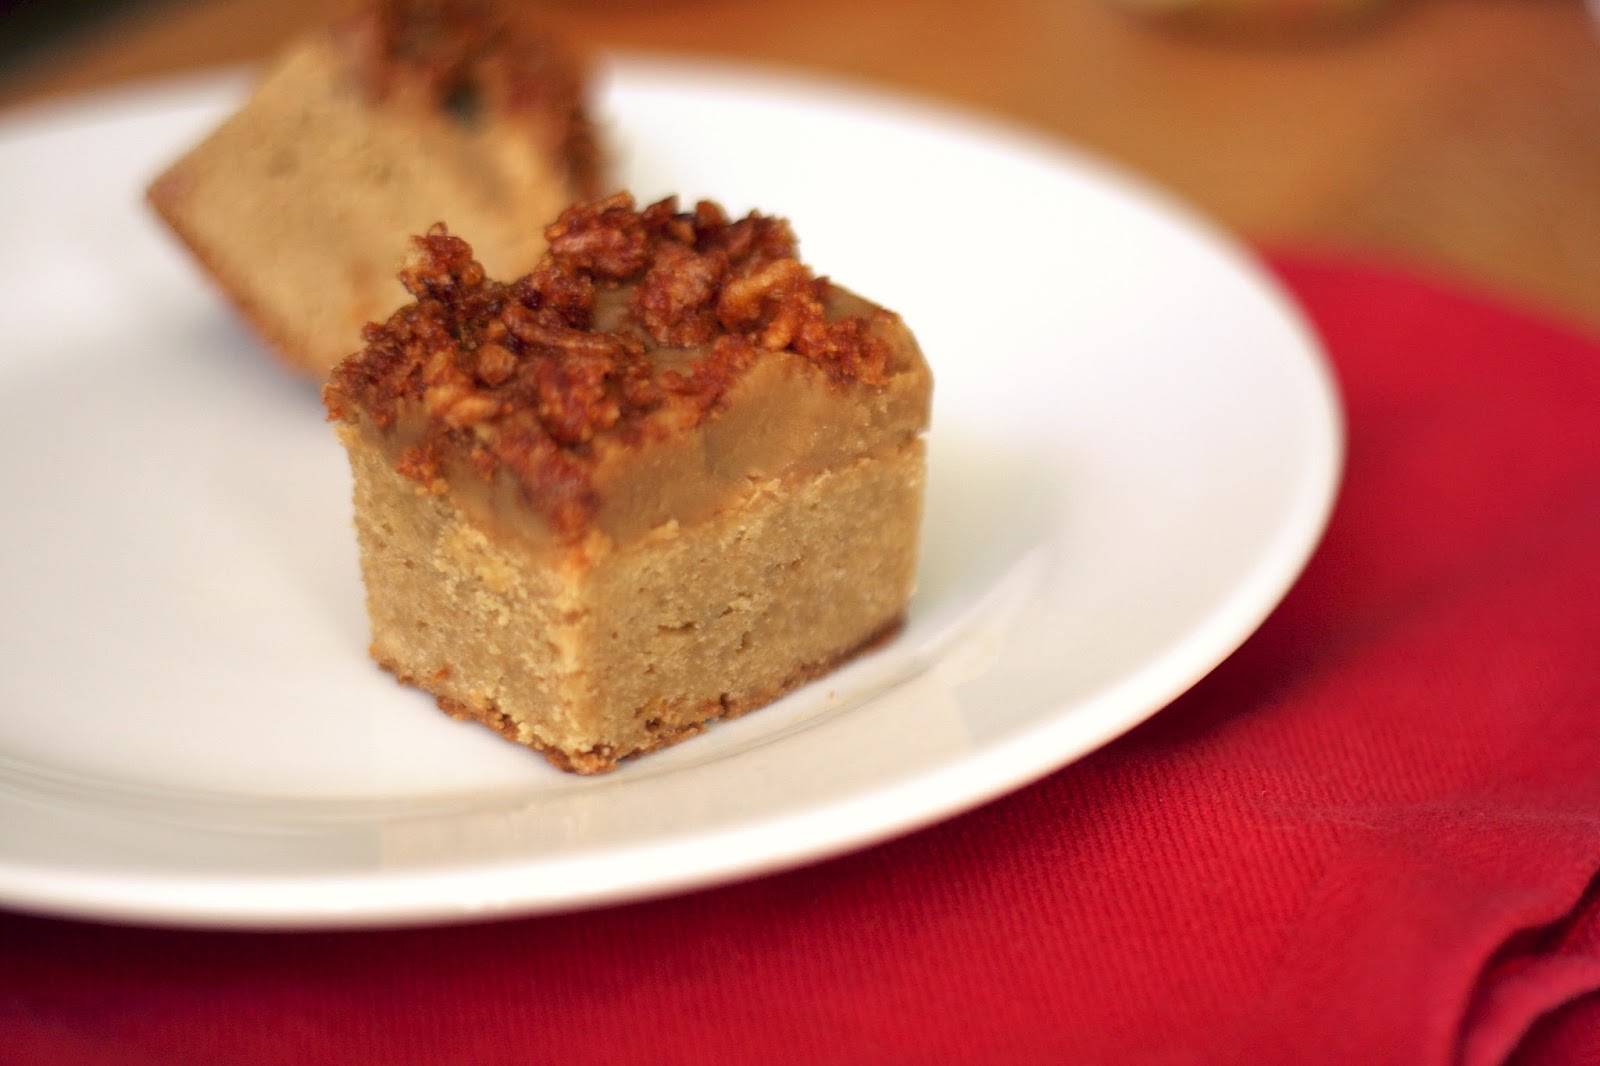
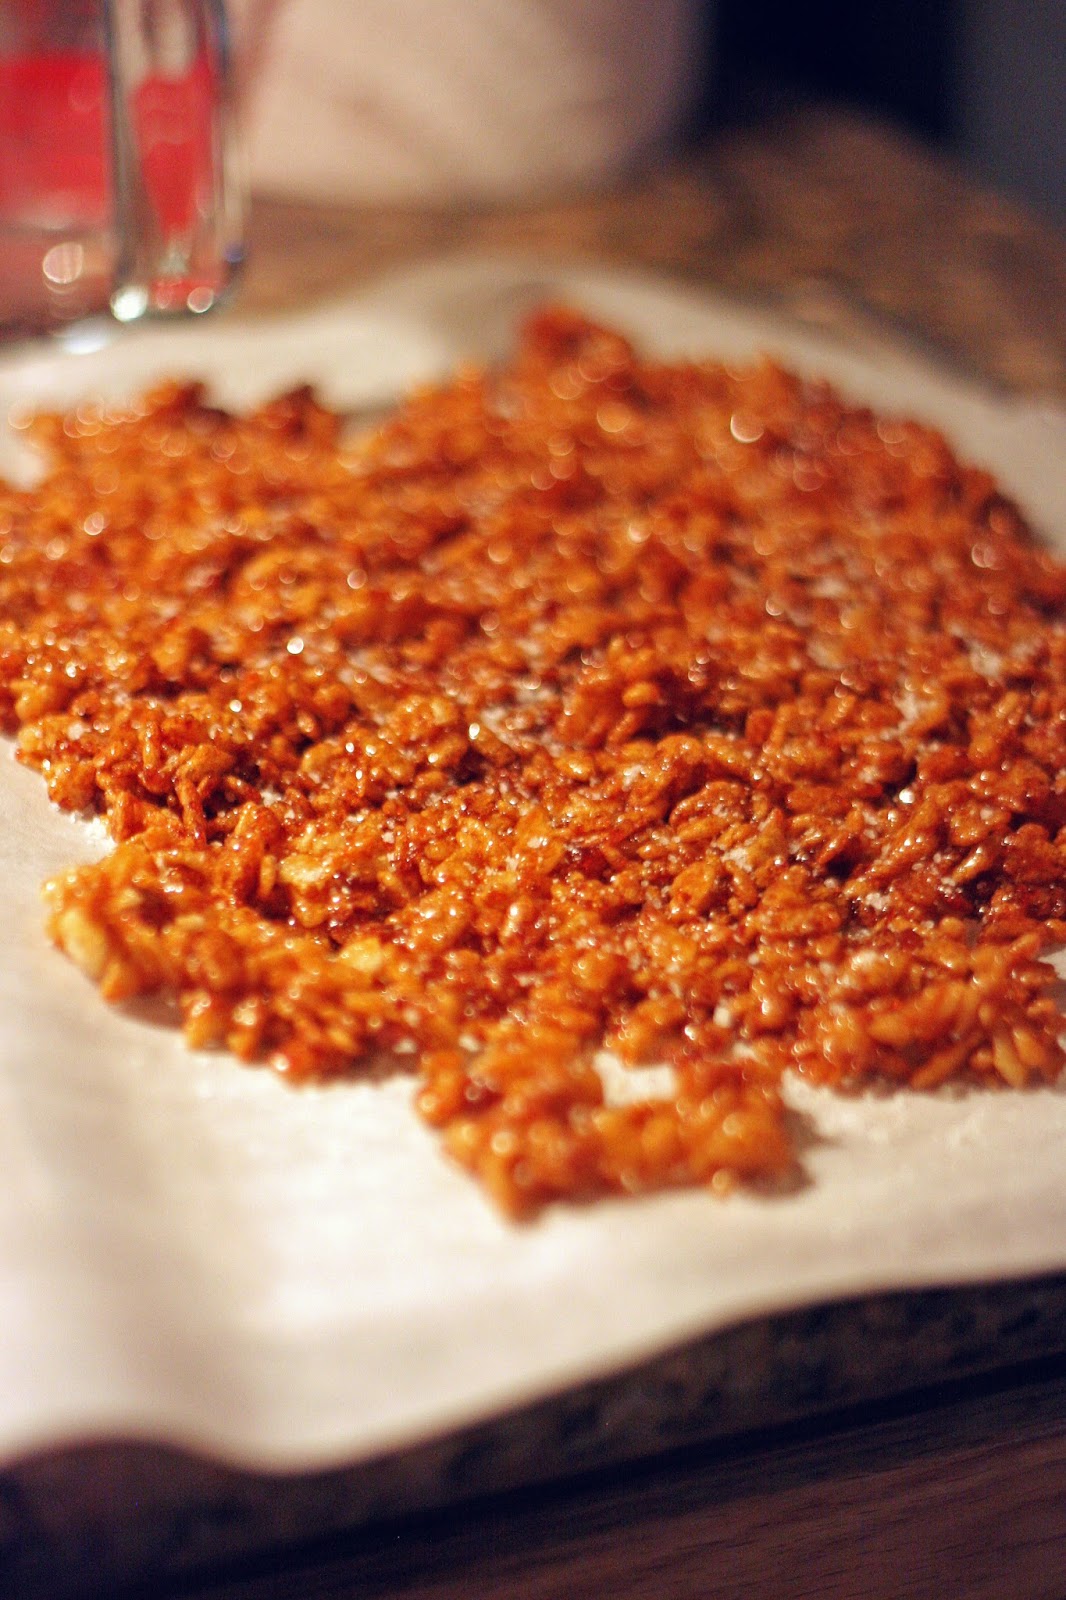
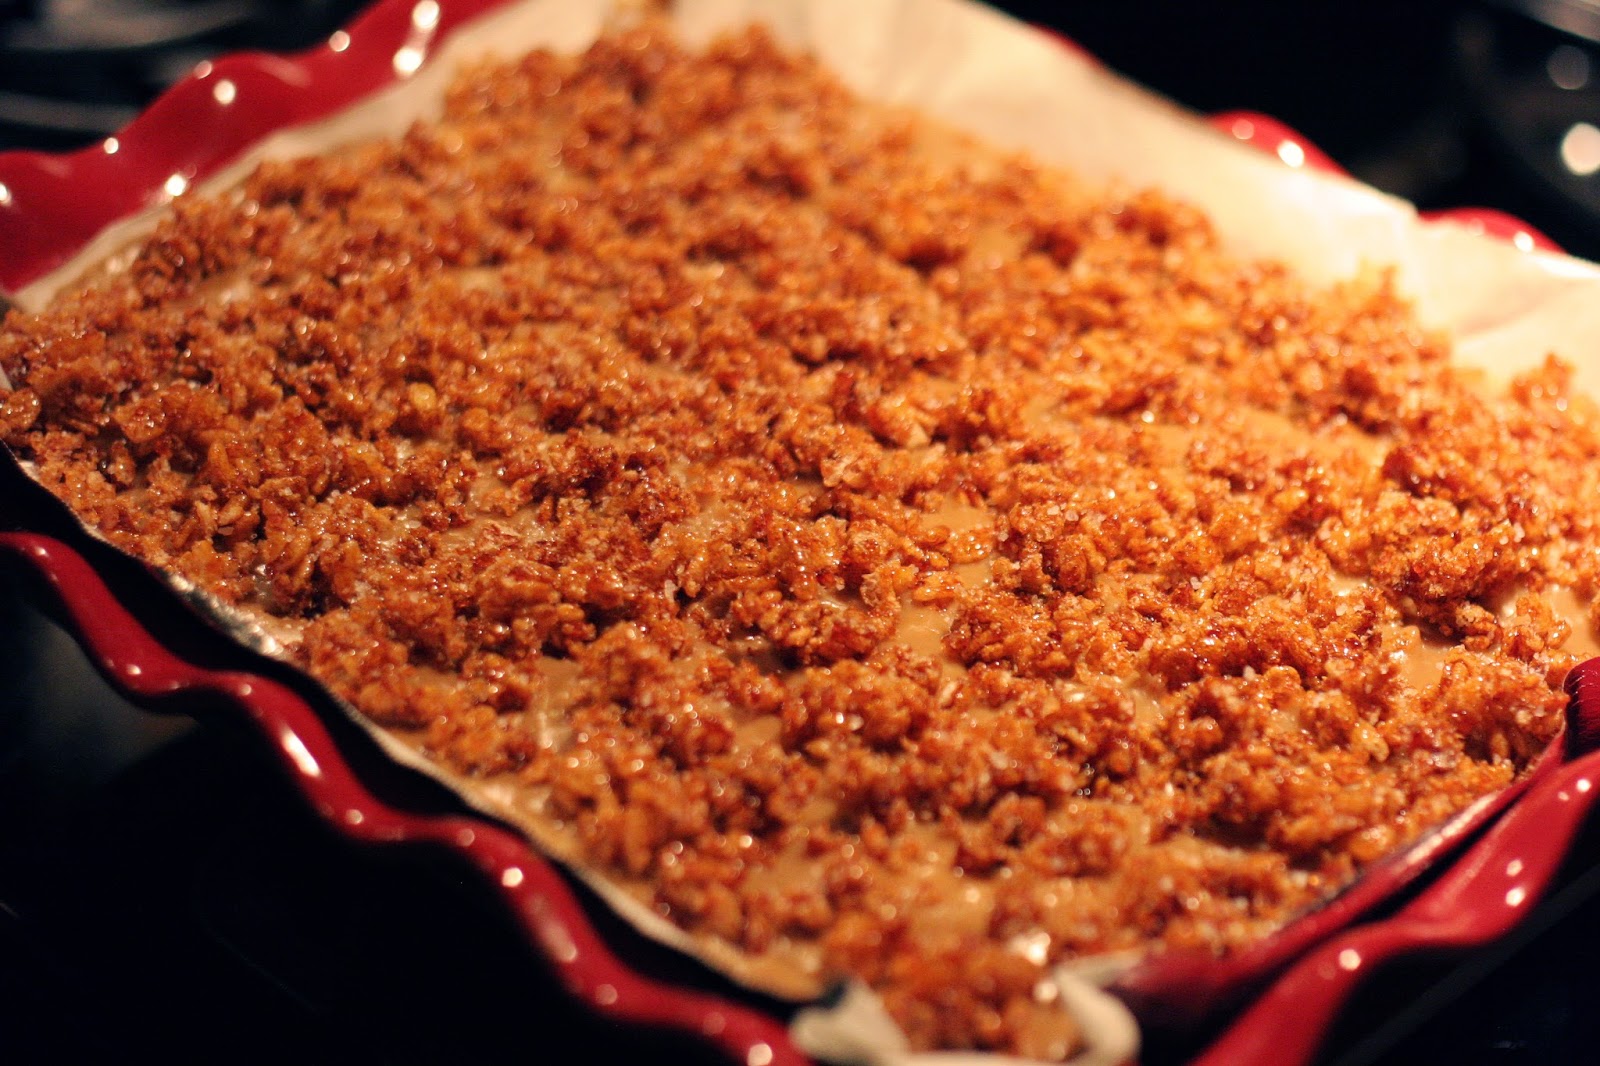
The bars center around a rice-krispies-caramel-crunchy topping. That would be the caramel that I burnt.

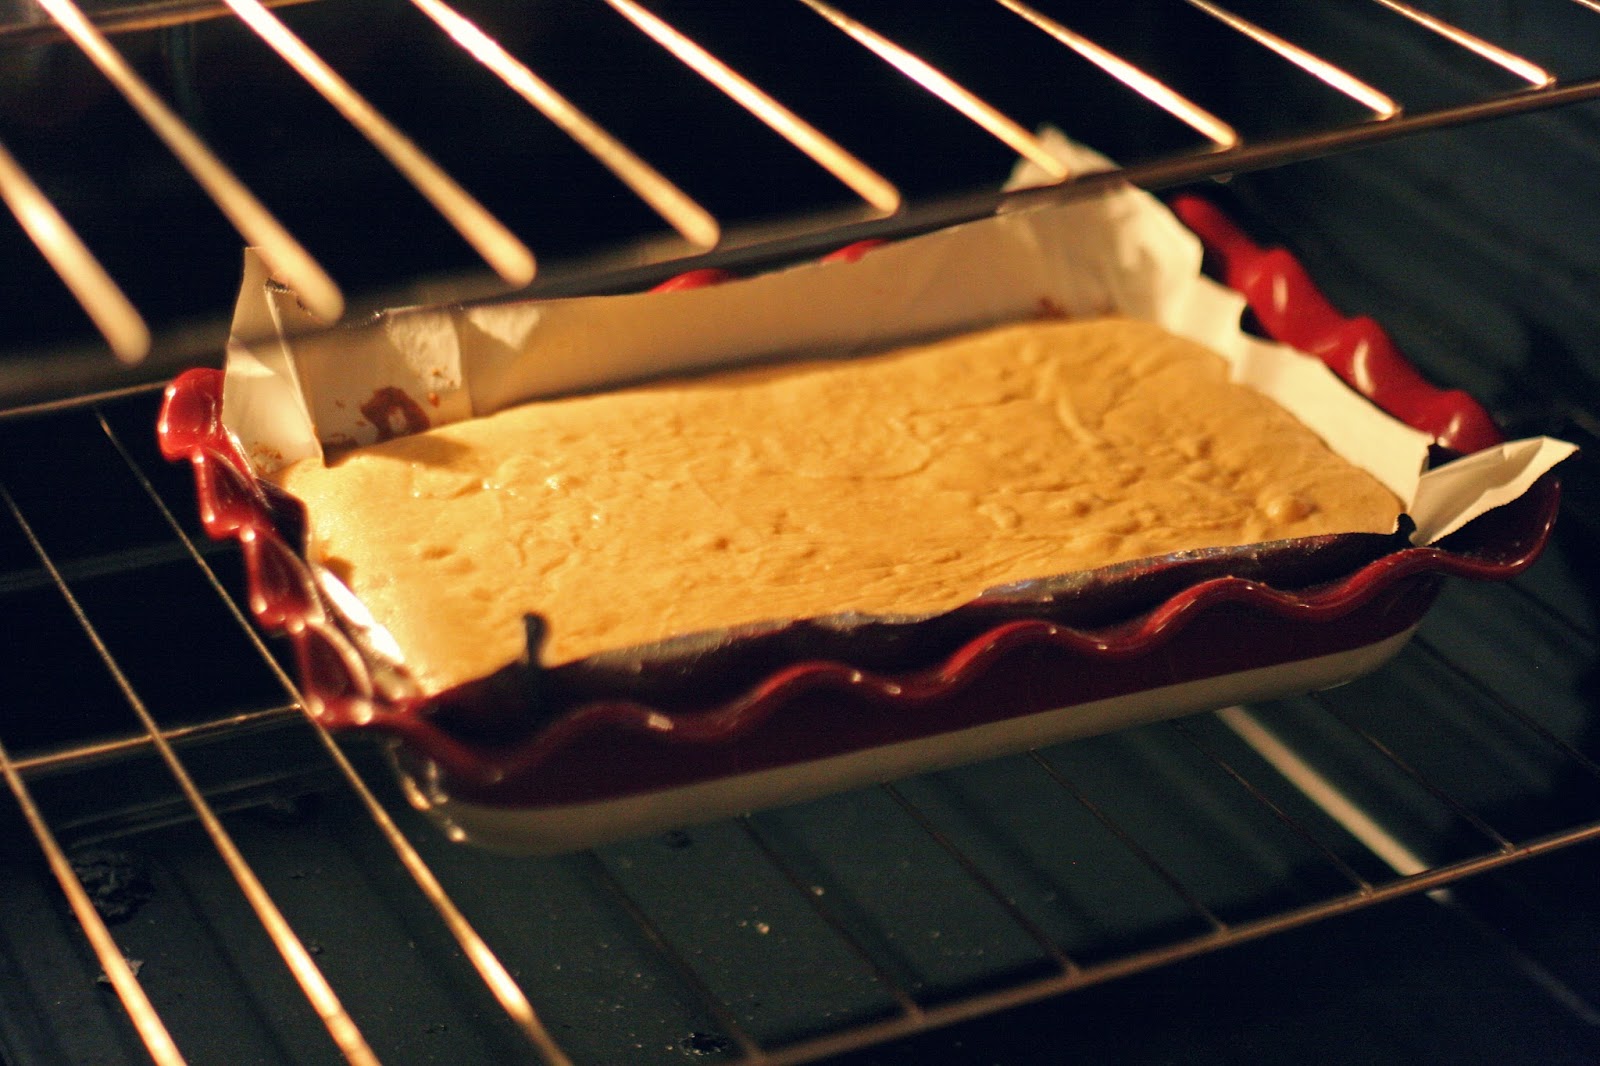
Once the topping is made and the rice krispies have been mixed with slightly-overdone (in my case) caramel and set aside to cool, you prepare the actual bar part – basically a blondie-type situation.

And then while that’s cooking, you make the caramel glaze, which thankfully doesn’t involve any actual cooking of caramel in the traditional sense and hence didn’t burn as most of my caramels traditionally do.

Finally, the bars get assembled and cooled for a very, very long time which sucks if you were hoping to eat them right out of the oven, so to speak, but is awesome if you were looking for a dessert to make the day before and then bring to a party (say, 4th of July tomorrow?).

These were generally a huge hit – luckily for me, the bars and glaze are sweet enough that the unintentional bitterness of the caramel crunch topping was well balanced, and the sprinkle of sea salt brought out all the right flavors. These are rich, so I got a lot of bars for my buck, so to speak, giving them one more point in the “party dessert” column. Thanks Peabody for the recipe!

Salted Caramel Crunch Blondies
From Culinary Concoctions by Peabody

As noted, the 7-8 hour cooling time makes these a great make-ahead dessert (and in fact, ONLY a make-ahead dessert, please don’t make these thinking you’re going to eat them tonight). They do tend to start softening up if you leave them out, so any leftovers would be best kept in the fridge. And as noted above, I prefer to cut these into smaller bars, since even with added bitterness (not that I’m recommending you burn your caramel) they are quite rich.

Yield: 12 Big Blondies or 24 Smaller Blondies
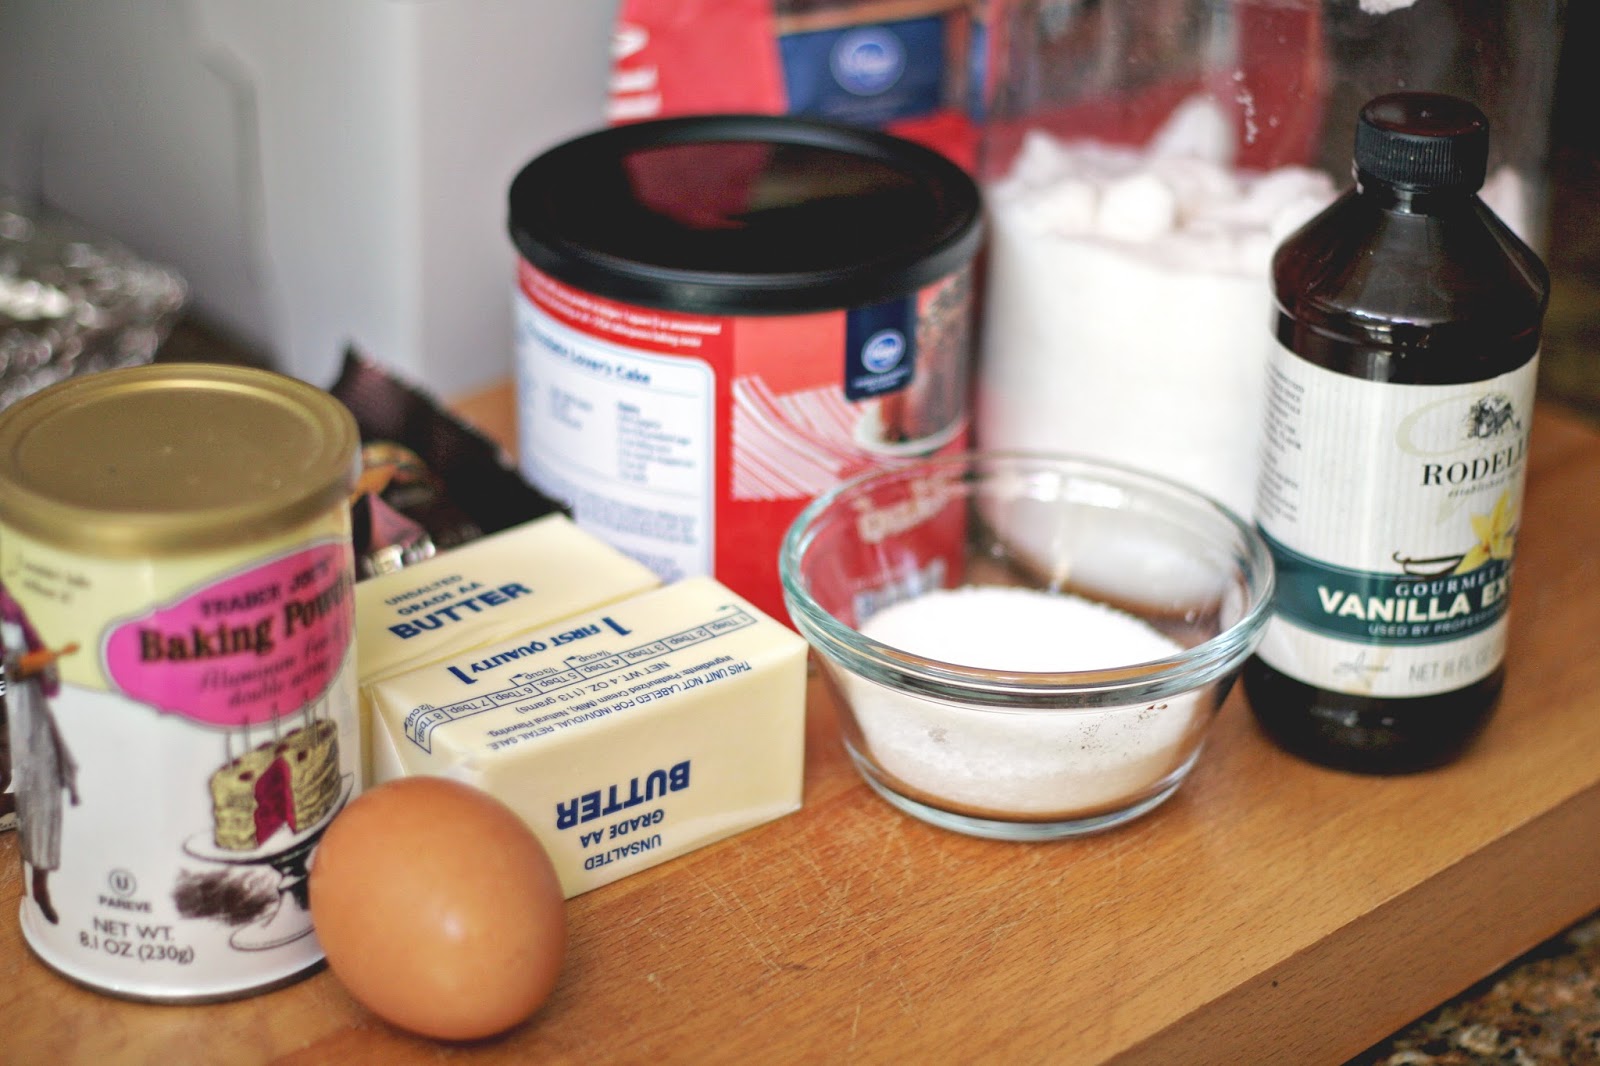
Ingredients
Salted Krispie Topping
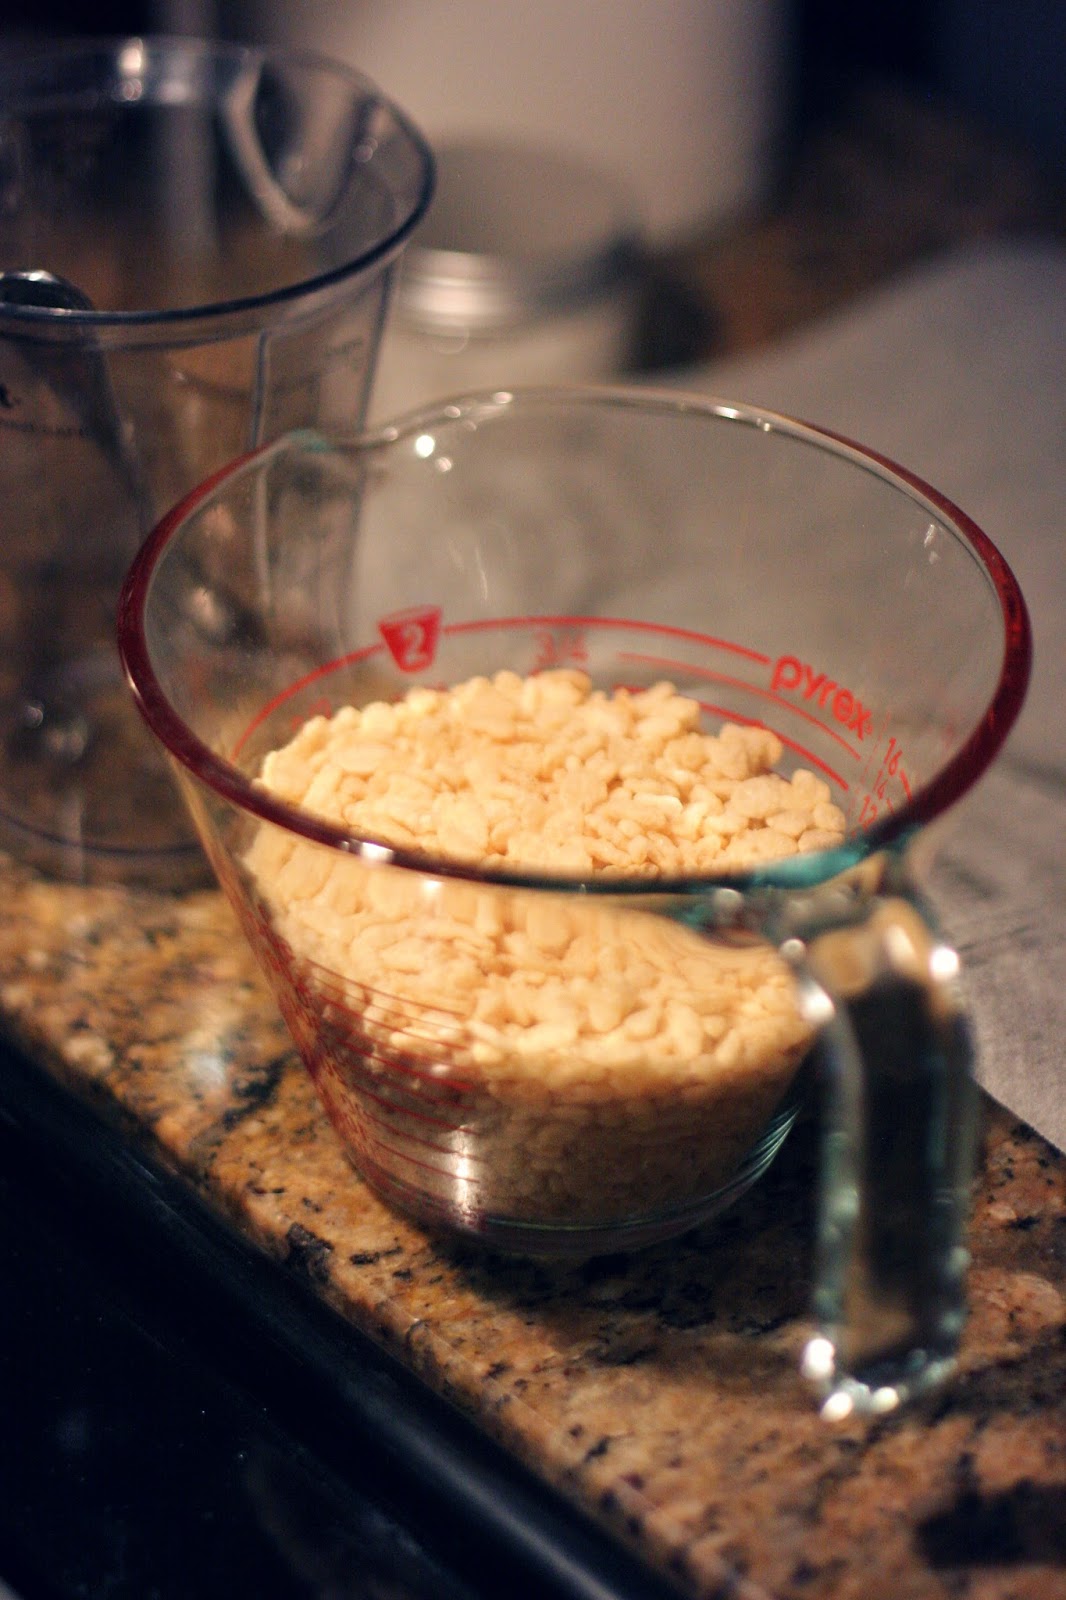
1 ½ cups Rice Krispie cereal
½ cup granulated sugar
1 Tb. water
1 tsp. Lyle’s Golden Syrup or corn syrup
½ Tb. fleur de sel

Blondie Batter
12 oz. unsalted butter, at room temperature
1 cup granulated sugar
1 ¾ cups brown sugar, packed
3 large eggs
2 tsp. vanilla extract
3 ½ cups all-purpose flour
1 tsp. salt
1 ¾ tsp. baking powder
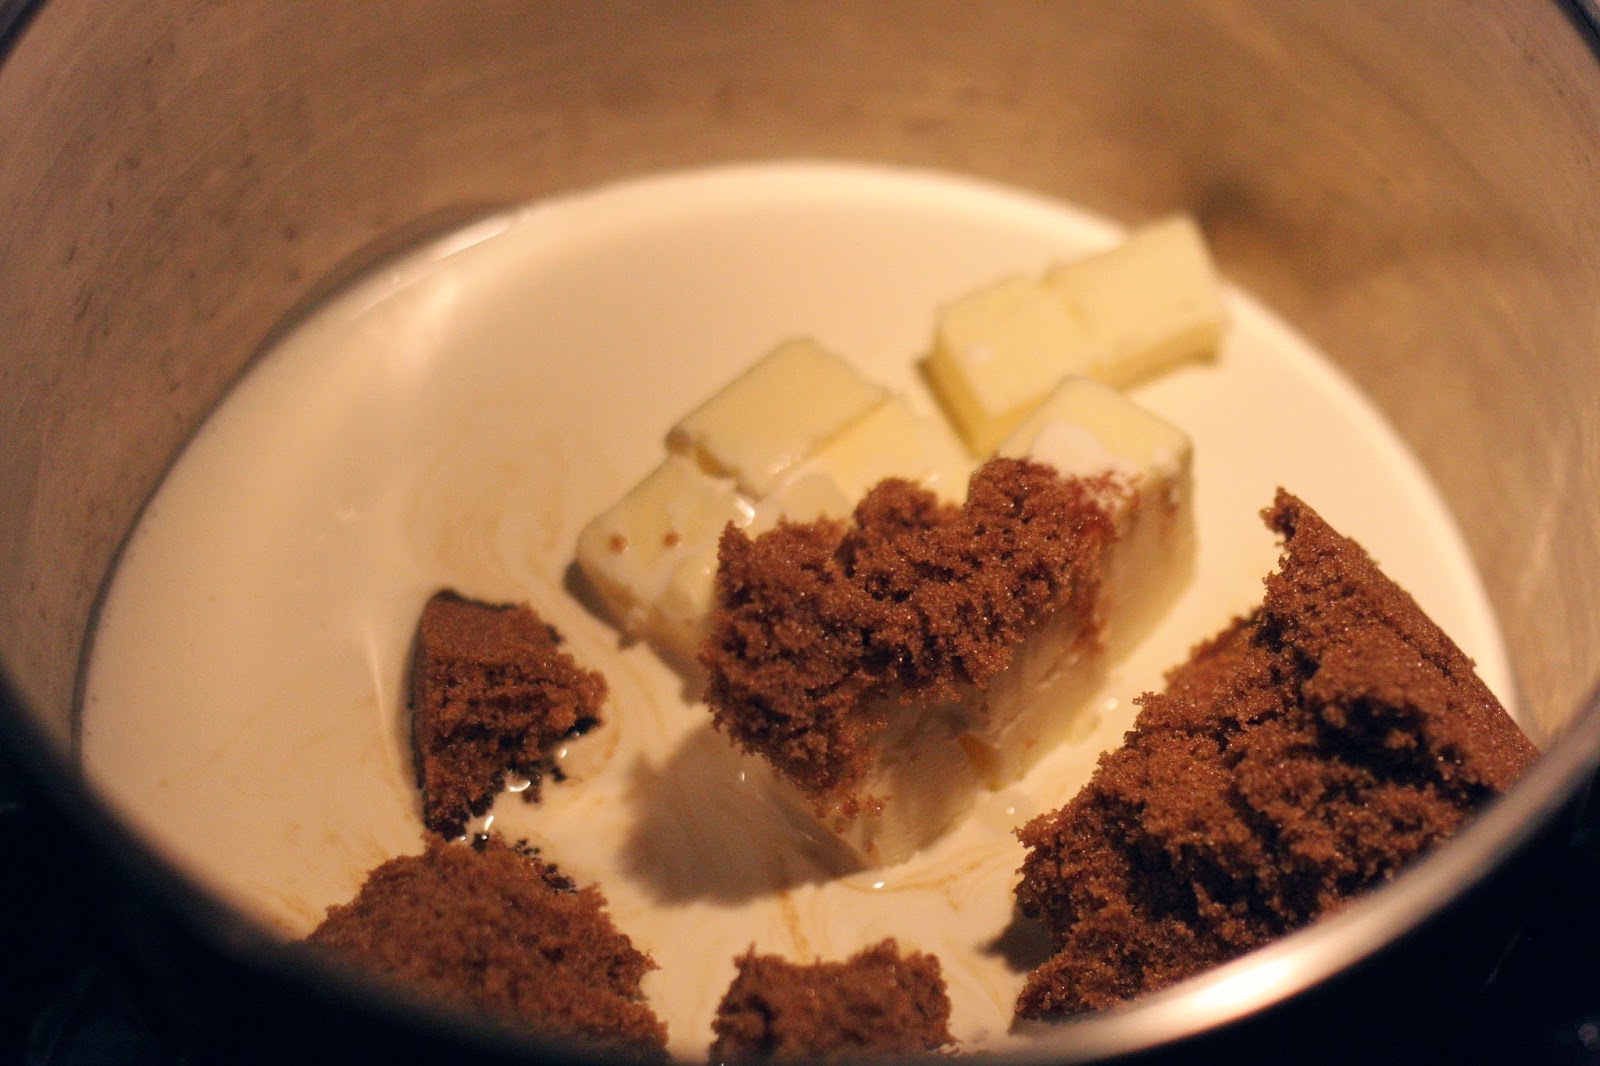
Caramel Glaze
3 oz. salted butter
¾ cup heavy whipping cream (try and find 40%)
1 cup brown sugar, packed
1/4 tsp. salt
1 tsp. vanilla extract
1 cup powdered sugar

Instructions
Salted Krispie Topping
Place parchment paper on a baking sheet. Measure the cereal out.

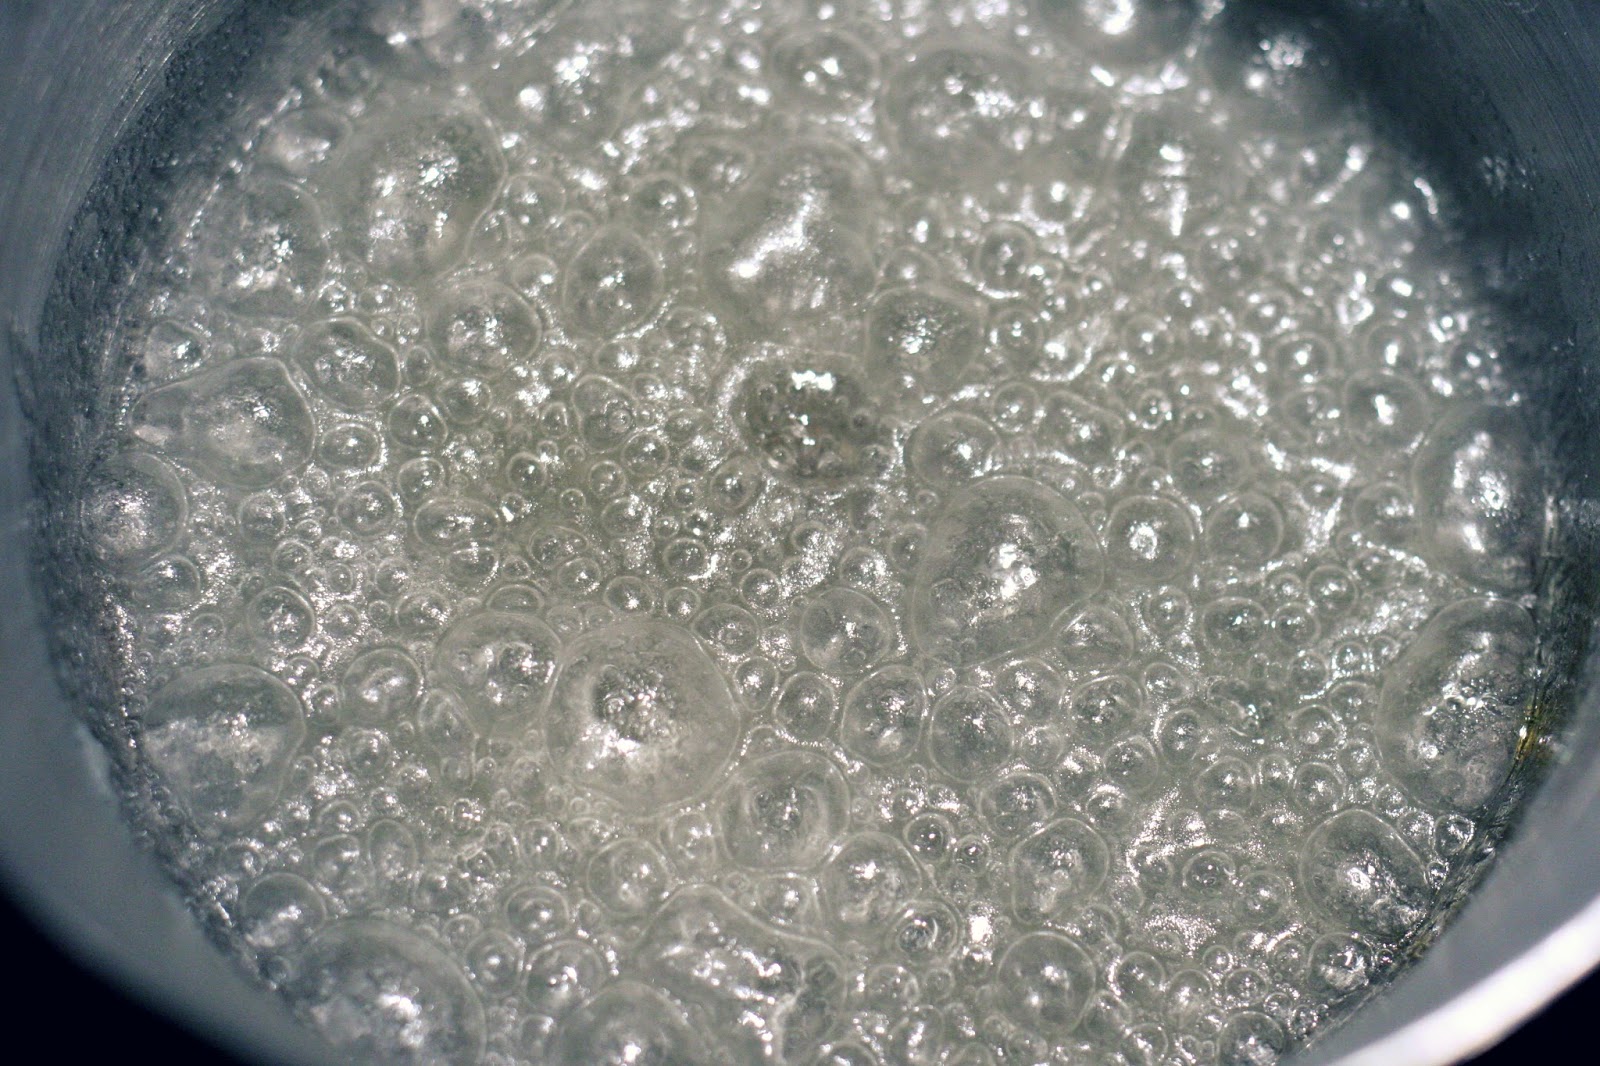
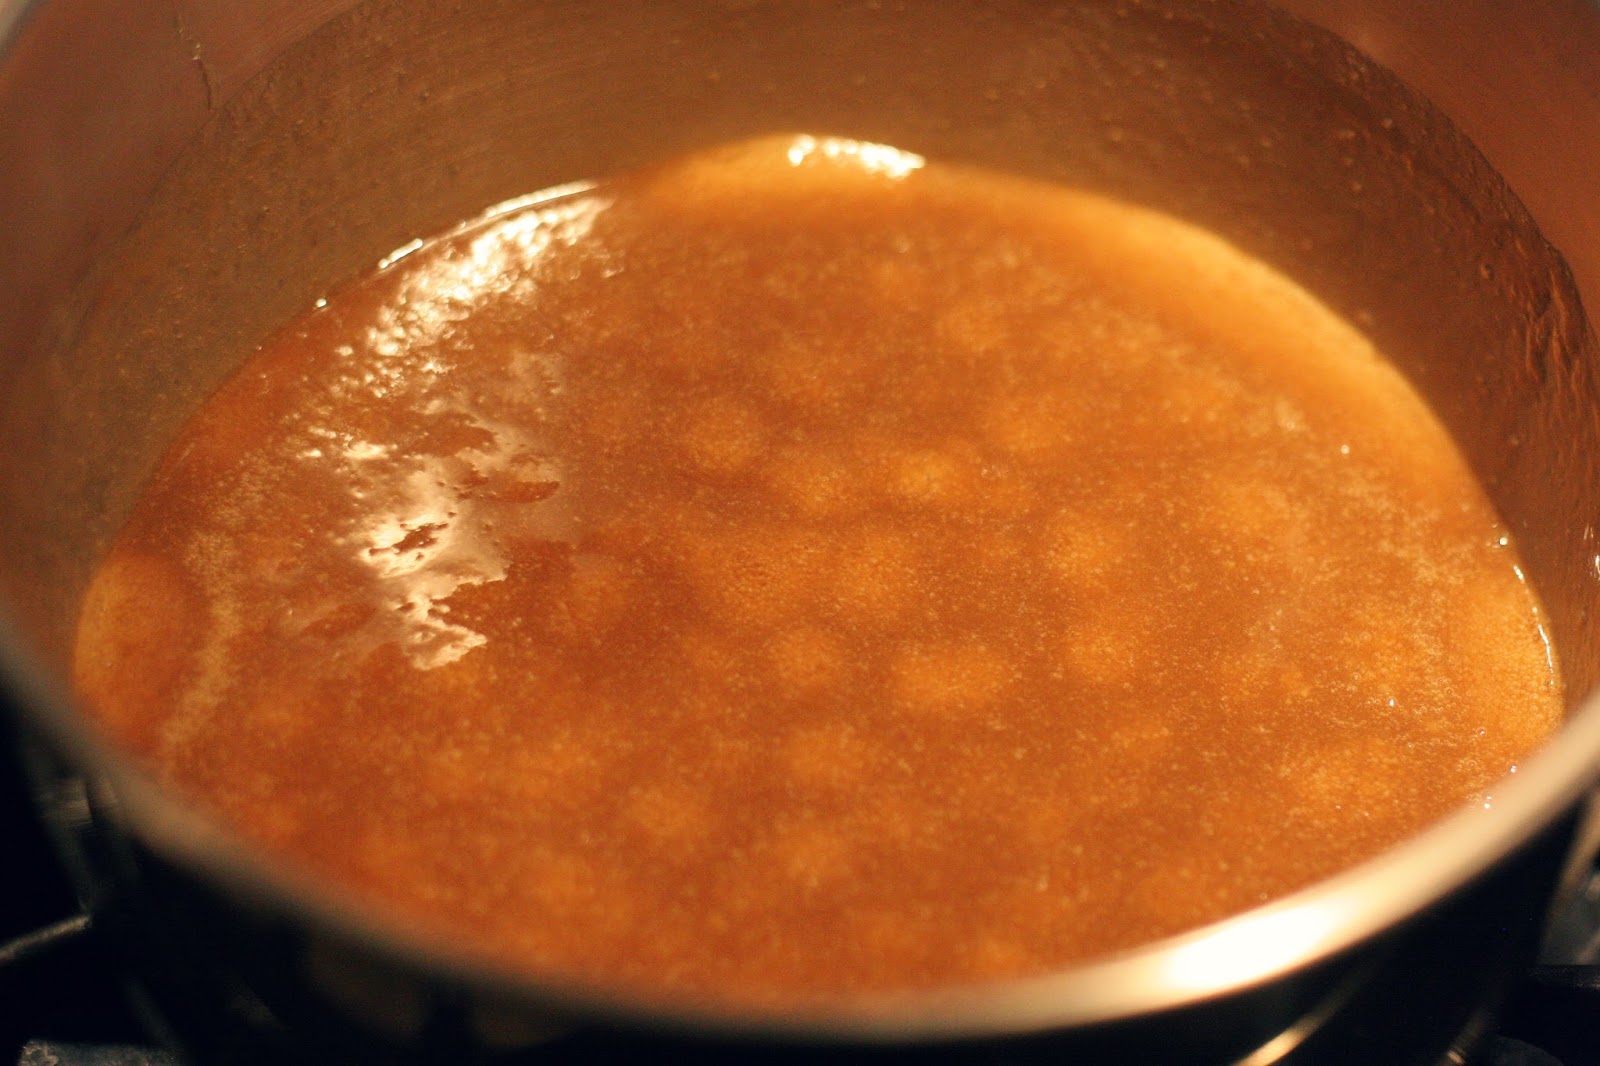
Using a small saucepan (I recommend an older one that doesn’t conduct heat well…you make less mistakes that way) add the sugar, water, and Lyle’s Golden Syrup, stir until combined. Bring to a boil over medium-high heat. Once mixture comes to a boil, lower heat to medium and boil until a medium-amber color forms, about 5 minutes.

Remove from heat and add the cereal, making sure to coat all the cereal with the caramel. Pour out the caramelized cereal onto the parchment paper on the pan. Spread it out as best you can. Sprinkle evenly with the fleur de sel and let cool to room temperature. Set aside.

Blondie Batter
Preheat oven to 350F. Spray a 9×13-inch baking pan with baking spray. Place aluminum foil or parchment paper into the pan and have it form an overhang to make removal of the blondies easier. Spray baking spray on the foil or parchment.

Using a stand mixer with the paddle attachment, beat together the butter and sugars, until light and fluffy, about 3 minutes.

Add the eggs one at a time and scrape down the bowl and sides after each addition.

Add the vanilla and beat another 30 seconds.

Add the flour, baking powder, and salt and mix on low speed and mix until fully combined.

Scrape the batter into the prepared pan and spread evenly (as best you can). Bake for 20 minutes at 350F. Then lower the oven to 325F and bake for another 16 minutes (mine took another 3 after that) or until a toothpick or knife inserted comes out clean.

Cool on a wire rack for at least 15 minutes.

Caramel Glaze
Cut butter into 8 slices. Place the butter slices, cream, and brown sugar into a small saucepan. Cook over medium heat, stirring occasionally, until the butter has melted.

Once melted, turn up heat to medium-high and bring to a full boil, boil for two minutes without stirring. Remove from pan and add vanilla and salt.

Let sit at room temperature for 30 minutes.

Add sifted powdered sugar and whisk until it forms a smooth glaze and you don’t see any stray powdered sugar. Pour glaze over the blondies, use a spatula to distribute the glaze evenly.

Chop up the caramelized cereal with a knife into ¼-inch pieces. Immediately sprinkle them over the glaze (push down a little) so that when the glaze cools they will stay put. Cool for 30 minutes.

And now the hard part…put in the fridge for at 7-8 hours or overnight.

Remove from fridge. Run a knife around the edges so that removal will be easier. Hopefully you can just tilt them on their side…if they don’t come out tug a little on the foil or parchment to get them to come out. Cut with a knife and serve.

Eating In: Weeknight Miso Soup

When I saw the miso soup on The Crepes of Wrath, I was immediately intrigued – and skeptical. Could miso soup REALLY be dinner? So, I made it. And while it is a light dinner, with the poached egg, I’m now convinced – I think.
The soup definitely isn’t your average miso soup – it’s chock-full of stuff, and stuff with substance – mushrooms and tofu for protein, accented with shallots and scallions and nori and ginger and of course – that key poached egg (god, I love a poached egg).

You start off, once all your bits and bobs are sliced and chopped (why does that always take longer than I think?), by sautéing.

Once everything is sautéed, in goes the water, and then, the miso (carefully using a separate bowl-whisky-method – thanks, Sydney) and voilá – soup! You stir in some more stuff, season to taste, and serve. Oh, and in the meantime or beforehand or sometime, poach an egg or four.

In the end, the soup had enough going for it that I think it was fair to call it dinner, if one that fell on the lighter end of the spectrum. The poached egg was definitely key. I did wish it had a bit more flavor, but I think that would be easy to adjust. We added in some sriracha, which helped. I still definitely prefer the original version of miso soup followed by a main course of sushi, but this is a fun little twist.

Weeknight Miso Soup
From The Crepes of Wrath

I think if I made this again I would add more miso – though admittedly my miso was a bit on the older side – but I think that once the egg was eaten up, it needed a little punch. I did add some soy sauce, and maybe it just needed more seasoning. The sriracha definitely helped, but overall I think I wanted a bit more miso taste for my miso soup.

Yield: 4 Servings

Ingredients
2 teaspoons sesame oil
2 cups mushrooms, roughly chopped or sliced
1 shallot, minced
3 cloves of garlic, minced
1 1-inch piece of ginger, minced
8 cups water
¼ cup white miso paste
1 block firm tofu, dried and cut into bite-sized cubes
2 sheets nori (seaweed), sliced
3 scallions, thinly sliced
3-4 eggs, poached (optional) [not optional in my opinion!]

Directions
Heat your sesame oil over medium heat in a large pot. Add in your mushrooms and shallot, and cook for 5 minutes or so, until the mushrooms begin to sweat. Add in your garlic and ginger and cook for another minute or two, until fragrant.

Add in your water and bring to a boil, then reduce to a simmer. Place your miso paste in a medium sized bowl, then spoon 1 cup of hot water over it. Whisk to combine, then pour this mixture back into your soup – this ensures that your miso doesn’t clump up in your soup. Bring the mixture to a simmer and cook for 5 minutes.

Add in your cubed tofu, sliced nori and scallions. Stir to combine, taste and adjust seasonings as necessary. You can add a little soy sauce or salt if you feel like the soup needs it.

Spoon your soup into bowls, then add a poached egg to each bowl. This will keep well for up to 3 days in the refrigerator [probably without the egg].

Snack Time: Spiced Apple Chips

Every so often, when I’m at work and the only choices for snacks are the last three Brazil nuts in the mixed nuts container (Are Brazil nuts really cheap or something? Why even include them? No one likes Brazil nuts.) or a handful of some sort of generic brand cornflakes, I think to myself “I should buy snacks when we go grocery shopping.” 97.2% of the time, Sunday (when I do my grocery shopping) rolls around and SURPRISE! I’ve totally forgotten.
The other 2.8% of the time, I get my act together and prepare for/purchase some healthy snacks I can bring to work to stop me from shoving an uncooked bag of maple and brown sugar oatmeal down my throat at 4pm.
Which brings me to these Spiced Apple Chips, courtesy of A Cozy Kitchen.

These chips take a bit of time, but if you have a mandoline, they are supremely easy. You slice up a few apples super thin (You don’t have to peel or core them! God Bless America.), shake them in a bag with some spices, and pop them into the oven at low heat for a couple of hours. You let them cool, and voila! Snacks!

I found that after being stored, my chips erred on the side of chewy versus crispy, but they were still enjoyable if occasionally a tad overspiced (thereby losing some of the apple flavor). They are quite healthy and endlessly customizable, so the next time my CSA box sends me too many apples, I’ll give it another shot! And hopefully, I’ll also stop stealing bites of my co-worker’s hummus.

Spiced Apple Chips
From A Cozy Kitchen

I might cut down on the spices on these a touch, though I also think you can definitely customize the blend to your taste – the one I’d be sure to keep is the salt, which adds a nice unexpected savoriness. My apples took a bit longer to get crispy, but I’d imagine it depends on your apple variety, so just keep an eye on them or test a chip after the time in the recipe.

Yield: About 50 Chips

Ingredients
1 1/2 tablespoon of cinnamon
1/4 teaspoon cardamon
1/4 teaspoon nutmeg
1/4 teaspoon kosher salt
3 apples

Directions
Preheat oven to 200F. Line two baking sheets with parchment.

In a medium bowl, mix together spices and salt.

Crosswise, cut off both ends of each of the apples. There’s no need to core the apples. Using a mandoline (or sharp knife), slice the apples as thin as possible. (Approximately 1/16″ inch). Remove and discard any seeds from the apple slices. Add the apple slices to the bowl and toss with the spice mixture.

Transfer the apple slices to the baking sheets, in a single layer, being sure they do not overlap. Bake in the oven for about 30 minutes, then flip them over. Bake for another 30-45 minutes, or until crispy in appearance. Total baking time: 1 hour and 15 minutes.

They’ll become crispier after they cool.

Eating In: Orange Avocado Salad

A little while ago, my Best Friend Forever gifted me Erin Gleeson’s The Forest Feast and, especially since we started getting a CSA box, it has rapidly become the most-used cookbook in my kitchen. The recipes are simple and relatively healthy, cover the vegetable spectrum, and each one is accompanied by a drop-dead gorgeous picture (the most important thing, am I right?). 
Many of them aren’t what you’d consider “main” dishes (which hasn’t stopped us from using them as such one dinner or another), but they’re all so straightforward that it’s easy to make a few and pair them together for a fresh, bright meal. 
For instance, take this Orange Avocado Salad – simple, unexpected, delicious. Oh, and gorgeous – did I mention that?

It’s so easy to throw together, and if you live in California (yes, yes, I know, East Coasters – we have it good) you probably have everything you need sitting in your kitchen. Plus, for those of you who are sick of winter, it tastes like summer! Let’s be honest, you might need that right now.


Orange Avocado Salad
From The Forest Feast by Erin Gleeson

Erin Gleeson has gorgeous instructions for how to make those pretty avocado rounds on her site (and in the book) that I totally did not follow when I made this. Learn from my mistakes.

Yield: 2-4 Servings

Ingredients
2 oranges
2 avocados
2 tablespoons chopped scallions
2 tablespoons chopped fresh cilantro
Olive oil
Salt

Directions
Peel and slice the avocado and oranges into rounds. Layer alternating on a plate.

Sprinkle chopped scallions and cilantro over and drizzle with olive oil. Sprinkle with sea salt and serve!

I was not compensated for this post. All the opinions are my own.

No Recipe Required: Bruleéd Grapefruit

I love a really simple recipe – a no-recipe recipe – because you can memorize it and then pull it out of your pocket at a moment’s notice and feel all impressive and chef-y.
Case in point: this Bruleéd Grapefruit, courtesy of Late Afternoon. So simple, but it makes breakfast feel faaaaancy.

Start off by slicing your grapefruit in half and cutting around all the segments. I actually have a little serrated “citrus knife” that worked perfectly for this.

Then, sprinkle your grapefruit halves liberally with brown sugar. Yum. Brown sugar is the best.

Pop them under the broiler for a few minutes, until the sugar is melty and the grapefruit is starting to brown in spots. The Boy asked, “Isn’t warm citrus gross?” No. No, it isn’t.

And Bon Appetit! I imagine you could customize this is any number of ways (Late Afternoon adds basil to hers, or you could sprinkle on some cinnamon or cayenne or something), but it’s good and fancy just the way it is.

Eating In: Roasted Squash Salad with Goat Cheese and Pine Nuts

Weeknight dinners are always an attempt to find a comprise between the healthy, the delicious, and the quick. And now also to use up the produce from the CSA box before it goes bad or before a new box comes with more squash (SQUAAAAAASH).
CSA Lesson #432: Butternut squash is much more of an endeavor when it comes whole versus in those cute little cubes they sell at the grocery store.
Anyway, minus one snag to which I’ll alert you later, this recipe hit most of the marks we’re looking for in a weeknight dinner. So let’s get into it.
First off, you toast some pine nuts. I’m rubbish at toasting nuts – it’s like making caramel, it’s not done enough or it’s waaaay overdone – but these came out pretty well.

Meanwhile, peel and quarter your squash. I did not peel it. This was my mistake.

You see, the original recipe used acorn squash, and once cooked you can scoop the flesh out of the peel to eat it. Unfortunately, when cooked, the peel of the butternut squash sticks to its flesh like gum to a toddler’s hair. And it’s not so fun to eat. So learn from my mistakes. Peel it.

The squash gets cookin’ in the oven.

When the squash is about done or cooling, you mix up a very simple salad.

And in the end, top the squash with the salad, the pine nuts, and the goat cheese. The original recipe said extra vinegar was optional, and while it is optional, to me extra vinegar is never optional (you’re talking to someone who could drink vinegar through a straw).

And voila! A healthy, pretty simple, and actually quite impressive-looking dinner. (Just peel the god-d*mn squash.)

Roasted Squash Salad with Goat Cheese and Pine Nuts
Adapted from Gourmande in the Kitchen

The longest part of this recipe is waiting for the squash to cook (and prepping the squash) – the rest is startlingly simple and open to umpteen variations. For instance, the original recipe used acorn squash, made its own port wine vinegar, and used a mix of spinach and kale for the salad. I worked with what I had, and it was still quite tasty, so go crazy!

Yield: 2 Servings

Ingredients
1/4 cup pine nuts
1 medium butternut squash, peeled
3 tablespoons olive oil, divided
Sea salt
Freshly ground black pepper
2 tablespoons good balsamic vinegar, divided
5 oz baby spinach, washed and dried
2 oz goat cheese

Instructions
Preheat oven to 400 degrees. Spread pine nuts on a large rimmed baking sheet; toast in oven, stirring occasionally, until fragrant and lightly golden (about 5 minutes). Set aside.

Cut squash in half and scrap out seeds. Cut into quarters.

On a large baking sheet, toss squash with 1 tablespoon of the oil and a pinch of salt and pepper. Roast until tender (about 35 to 45 minutes depending on size); let cool.

In a large bowl add 1 tablespoon of balsamic vinegar, remaining olive oil; season with salt and pepper to taste. Add baby spinach, toss to combine.

To serve, divide squash among plates; place dressed salad on top of each quarter, drizzle with extra balsamic vinegar (if desired), and top with toasted pine nuts and crumbled goat cheese.

Eating In: Butternut Squash Rotini

So, as I’ve mentioned, the Boy and I get a CSA box every other week, and while it has totally inspired us to eat more veggies, we are also constantly struggling to think of ways to use up all the awesome produce before it goes bad. Which is what inspired this dish – a dish I actually MADE UP MYSELF one lazy night with the sole purpose of using the butternut squash we’d received in our box.

Ok, it’s not groundbreaking. But it’s easy and tasty!

I’ll tell you, peeling and cubing butternut squash is no easy task – but I think I did a grocery-store-worthy job:

A little salt, a little pepper, some olive oil and into the oven!

The box also came with fresh sage, so as I cooked the squash and some rotini, I browned some butter with sage.

I added in some heavy cream left over from making a dessert, some freshly grated parmesan, and tossed everything together with a little leftover why-not-clean-out-the-fridge goat cheese…

And voila! Dinner! Topped with a little more parm, the pasta had nice sweetness from the squash and salt from the cheese. Simple? Sure! But I DID IT WITHOUT A RECIPE PEOPLE. And it has more than five ingredients. Small victories.


Butternut Squash Rotini
By Yours Truly 🙂

I will admit I don’t usually make up my own recipes, so if something seems a bit off here or I totally mixed up the order of everything or you’ve got a way to make it better, don’t only go ahead and change it – let me know! Either way, I NEVER cook without a recipe, so I was pretty pleased with myself.

Yield: 4 Servings

Ingredients
1 medium butternut squash, peeled and diced (1 inch cubes)
2 tablespoons olive oil
Salt
Pepper
4 tablespoons unsalted butter
2 sage leaves
7 ounces rotini pasta
1/4 cup heavy cream
1/4 cup parmesan cheese, grated, plus extra
2 ounces goat cheese

Directions
Preheat oven to 400°F. Toss squash with olive oil, salt, and pepper and spread on a baking sheet. Bake until tender and starting to brown, 20-30 minutes.

Meanwhile, cook your rotini according to the package directions.

Once the pasta and squash are done (or just about done), brown the butter in a deep skillet with the sage leaves. Browning butter can be tricky – keep an eye on it! Once the butter is brown, add the cream and parmesan cheese and follow with the pasta and butternut squash. Mix everything together to coat, then add in the goat cheese and additional salt and pepper to taste, if desired.

Serve up the pasta with more parmesan on top!